This error can occur for various reasons like bugs in Windows Explorer, missing startup folder, a recent malware attack, corrupted system files, etc. Here’s how to fix ‘There are no startup items to display’ error in Task Manager on your Windows PC.
1. Restart the Windows Explorer
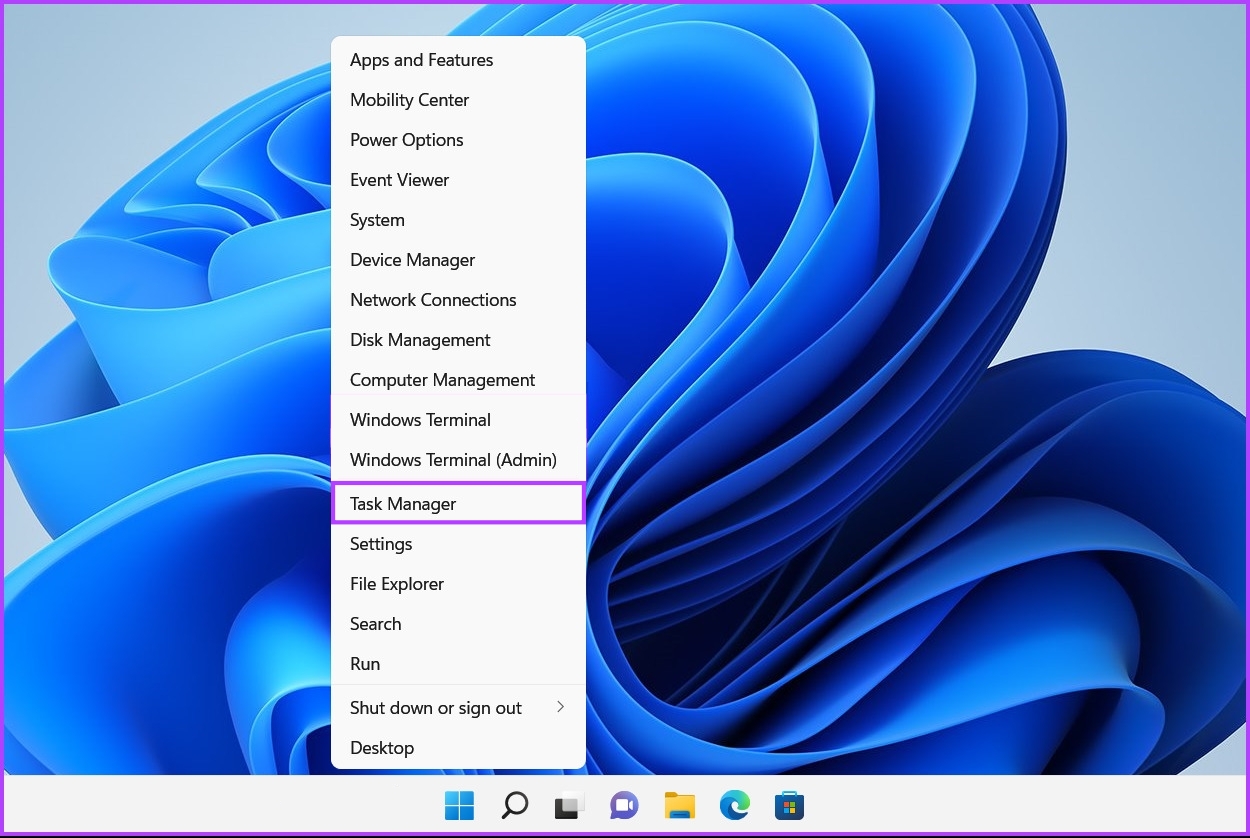
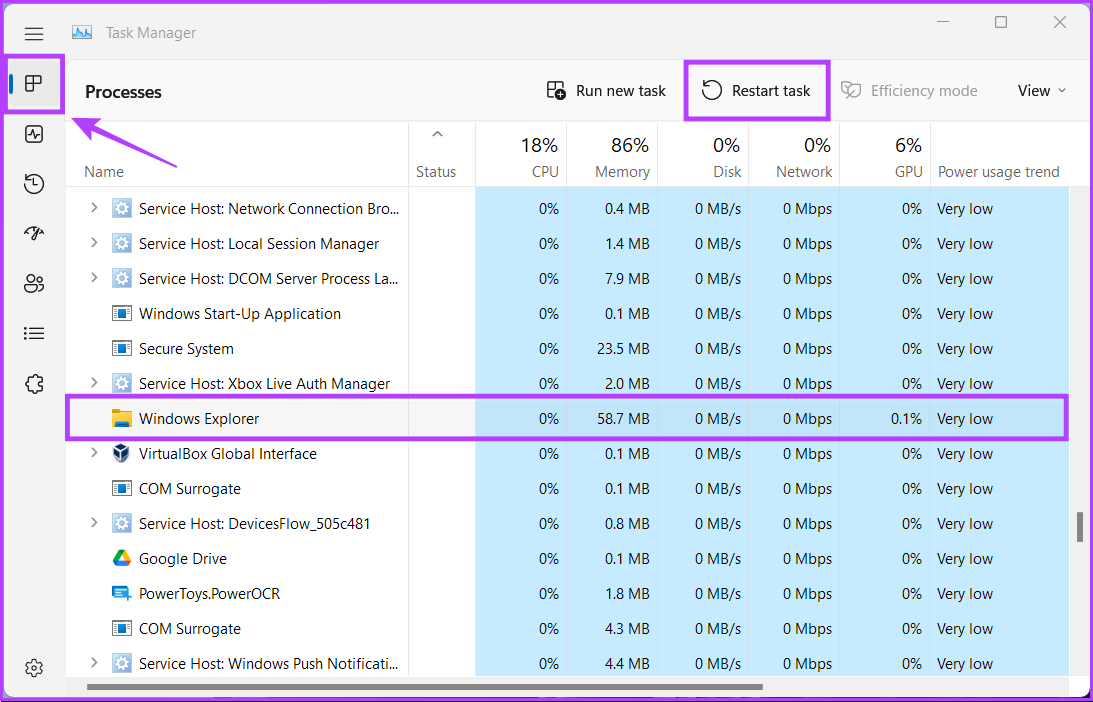
Whether you use several apps on your computer or not, several processes run in the background to deliver a seamless computer experience. However, if these processes fail to function normally, you might experience oddities like disappearing taskbar icons, the preview pane not working, etc. You can fix such issues by restarting Windows Explorer from Task Manager. Here’s how: Step 1: Press the Windows + X keys to open the Power User menu and select Task Manager. Step 2: In the Task Manager window, select the Windows Explorer process. Then, click on the Restart task button at the top. If you see more than one process related to File Explorer, select the one with higher memory usage. After you restart Windows Explorer, the missing startup items in Task Manager may get restored. If that doesn’t help, move on to the next solution.
2. Perform an Anti Virus Scan
Often hidden malware can lead to file corruption, breaking many crucial features on your system. Thankfully, you can get rid of such malware using the built-in Windows Security app or any third-party app, such as Malwarebytes. Here’s how you can detect and get rid of malware using the Windows Security app on your Windows computer: Step 1: Press the Windows + S keys to access Search and type Windows Security. From the search result, click on Open. Step 2: Click on the ‘Virus & threat protection’ option. Step 3: On the Virus & threat protection page, click on Quick Scan. If you find malware on your system, remove it and check if that brings back the missing startup items in the Task Manager.
3. Check if the Startup Folder Is Missing
You might be facing the no startup items to display error because Windows cannot find the startup folder containing the app shortcuts. If this folder is missing, Windows can’t identify those startup apps. To determine if this is the cause of the error, you will need to check if the startup folder is missing from your computer. Here’s how you can do that: Step 1: Press the Windows + E keys to open the File Explorer. Step 2: Copy and paste the following path into the File Explorer’s address bar to access the directory where the Startup folder is located. Step 3: When you reach the designated directory, look for a folder called Startup. If a Startup folder already exists, move on to the next solution. But, if you can’t find the Startup folder, you will need to create a new one from scratch. Step 1: To create a new folder, click on New from the File Explorer toolbar and select Folder. Then, click Yes and follow the on-screen instructions to create a new folder. Step 2: When a New Folder appears in the directory, rename it to Startup.
4. Manually Add Programs to the Startup Folder
Even if the Startup folder isn’t missing from your computer, there’s a chance that the apps inside the startup folder are missing. In that case, you will need to manually add programs to the startup folder. Step 1: Press the Windows + E keys to open the File Explorer. Step 2: Copy and paste the following path into the File Explorer’s address bar to access the Startup folder: Step 3: When the Startup folder opens, click on New in top-left corner on the Explorer’s ribbon and select Shortcut. Step 4: Use the Browse button to locate and select the executable file of a program you wish to add to the Startup folder. Then, click on Next. Step 5: Type in a name for the shortcut and click Finish.
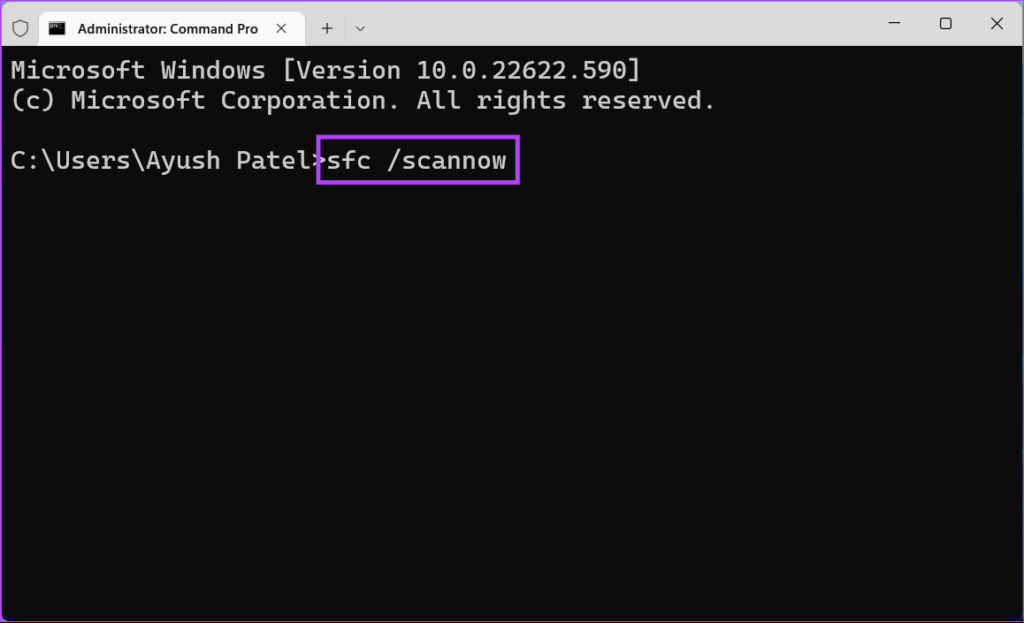
5. Run SFC and DISM Scans
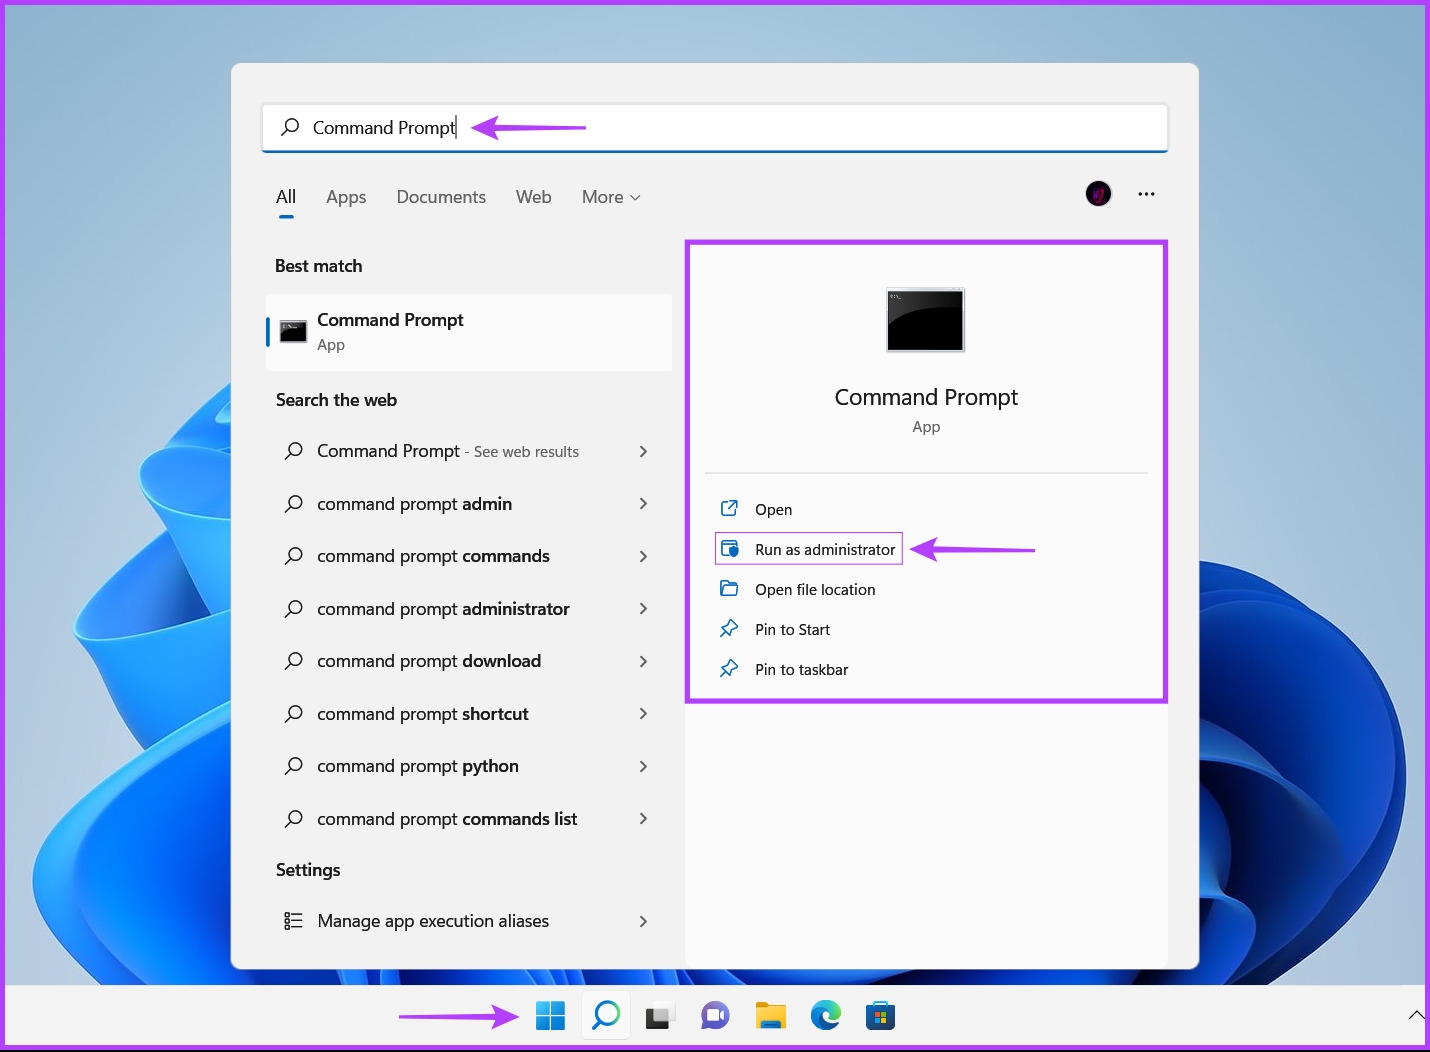
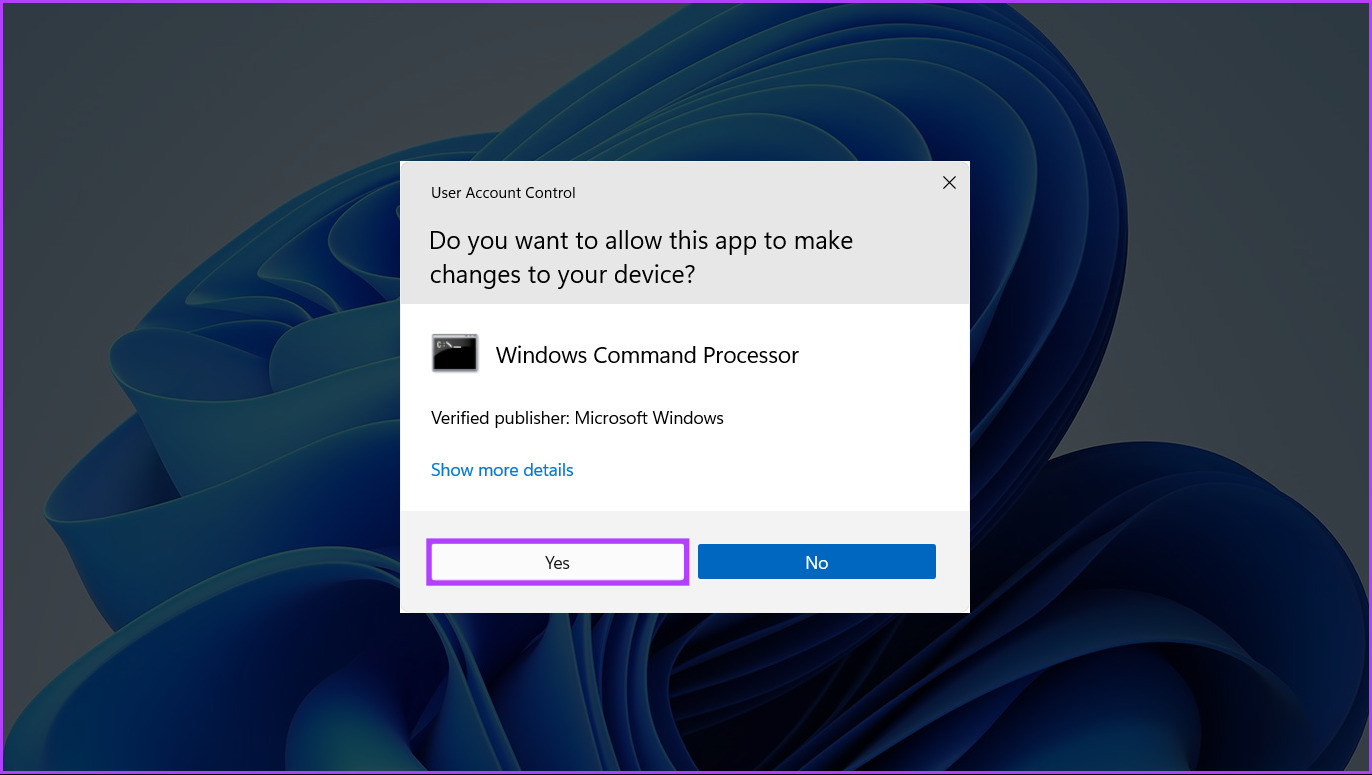
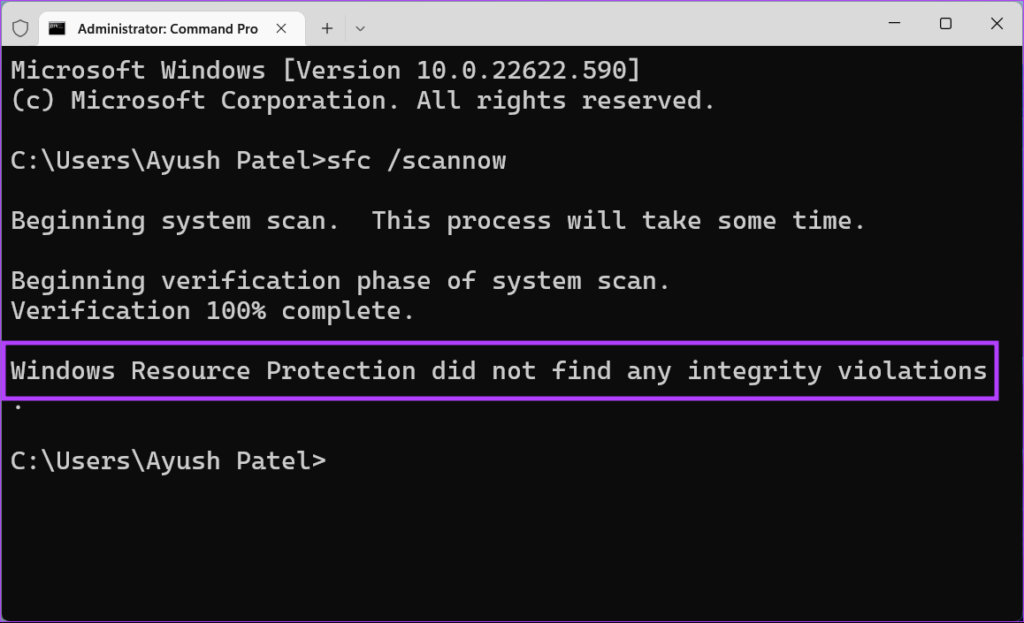
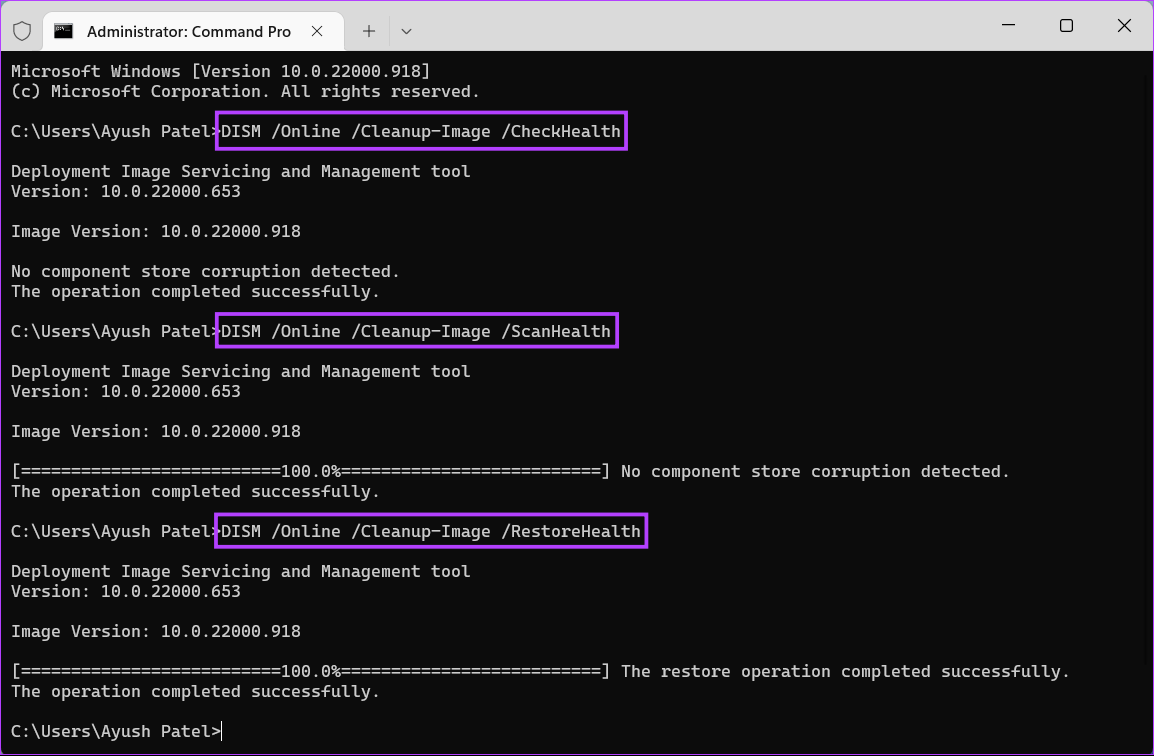
Corrupt files on your PC can often lead to issues such as missing startup items in Task Manager. You can run an SFC (System File Checker) scan followed by a DISM (Deployment Image Servicing and Management) scan to detect and fix corrupted files on your PC, as detailed in the steps below: Step 1: Press the Windows + S keys and type Command Prompt. Then, from the results for Command Prompt, click on ‘Run as administrator.’ Step 2: Click on Yes when a User Account Control (UAC) prompt appears on the screen. Step 3: Type the following command into the Terminal window and press Enter: This command instructs Windows to scan for corrupted DLL (Dynamic Link Libraries) and other vital system files on your PC. Furthermore, running this command replaces the broken system files with functioning ones if any corruption is detected. After the SFC (System File Checker) scan completes scanning your PC, you’ll see a message indicating whether it found any problems. If the SFC scan didn’t find any issues, you would get a message saying, ‘Windows Resource Protection did not find any integrity violations.’ However, if any issues relating to corrupted configuration files are discovered, it will automatically repair them for you. Step 4: Run a DISM (Deployment Image Servicing and Management) scan after the SFC scan. The DISM scans for corruption and repairs issues with the operating system. DISM also scans the recovery and boot sectors for corruption and restores the resiliency of system files if any corruption is detected. To perform a DISM scan on your computer, execute all the commands listed below one command at a time by copying and pasting them into Command Prompt and pressing the Enter after each one. This DISM scan might take some time. Restart your PC after completing both scans to see if it helps to fix your issues.
6. Perform a System Restore
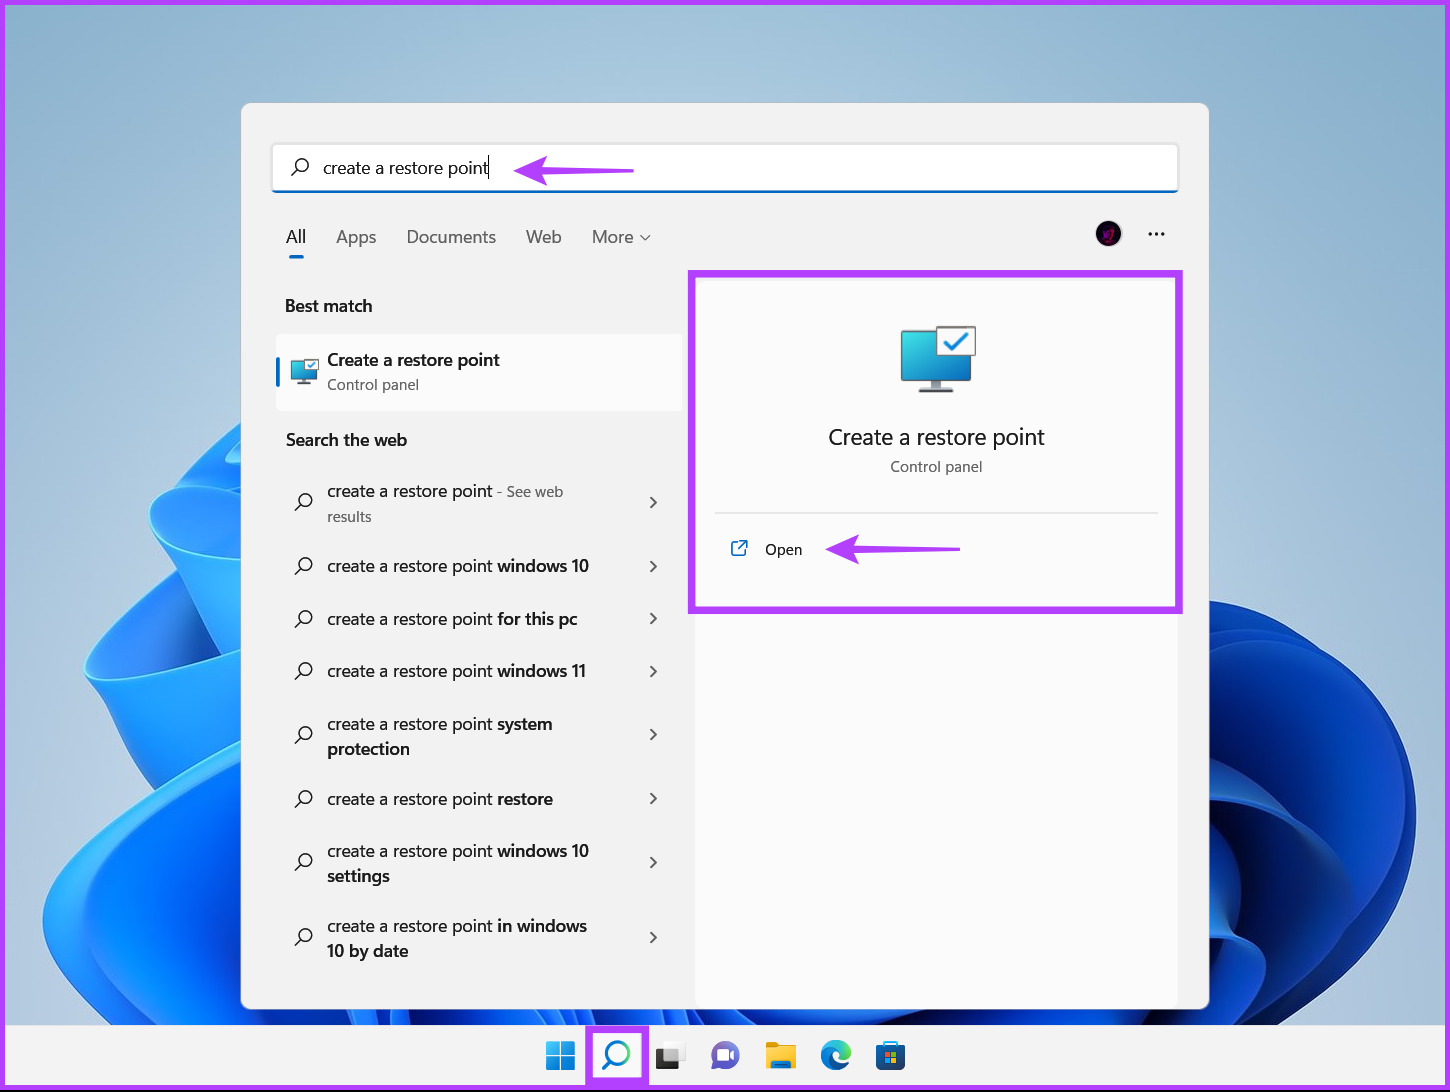
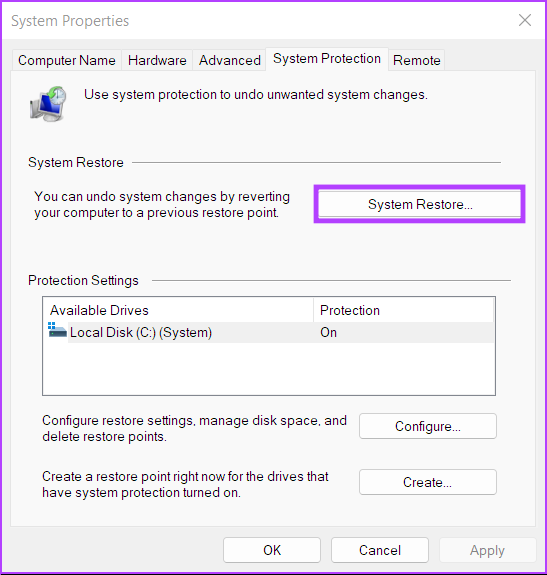
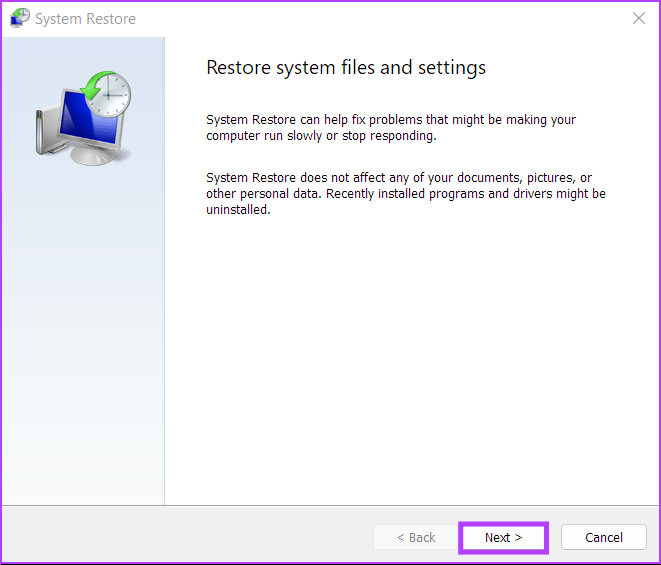
There’s a chance that you might be encountering issues on your PC because you may have accidentally changed critical system settings or installed an unstable app. However, you can reverse such changes and fix most problems on your PC by performing a System Restore. You can only use this method if System Restore is enabled on your PC. Check our guide on using System Restore on Windows 11. Here’s how you can perform a System Restore on your Windows 11 PC: Step 1: Click the Windows Search icon on the Taskbar and type Create a restore point. Then, select the Open button below the search result. Step 2: When a System Properties window appears on the screen, click on the System Restore button. Step 3: Click Next to commence the restoration process. Step 4: Select a restore point you want to use. If required, click on Scan for affected programs that will detect the ones that’ll be removed during the restore process. Then, click Next. Step 5: Confirm the restore point to which you want to revert your system. After verifying it, click on Finish to commence the automated restoration process.
Bring Back the Missing Startup of Items
That’s pretty much it. The above-listed should help you quickly bring back the Missing startup items inside the Task Manager. This’ll ensure that you can easily track and manage the programs that start with your PC. The above article may contain affiliate links which help support Guiding Tech. However, it does not affect our editorial integrity. The content remains unbiased and authentic.