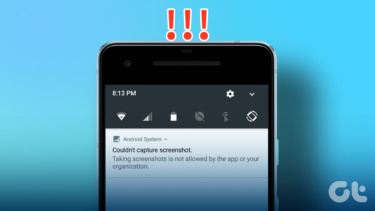
When screenshots stop working on iPhone, you might need to record screen content with another phone and share. It’s time-consuming and not a convenient way.
1. Take Screenshots on iPhone
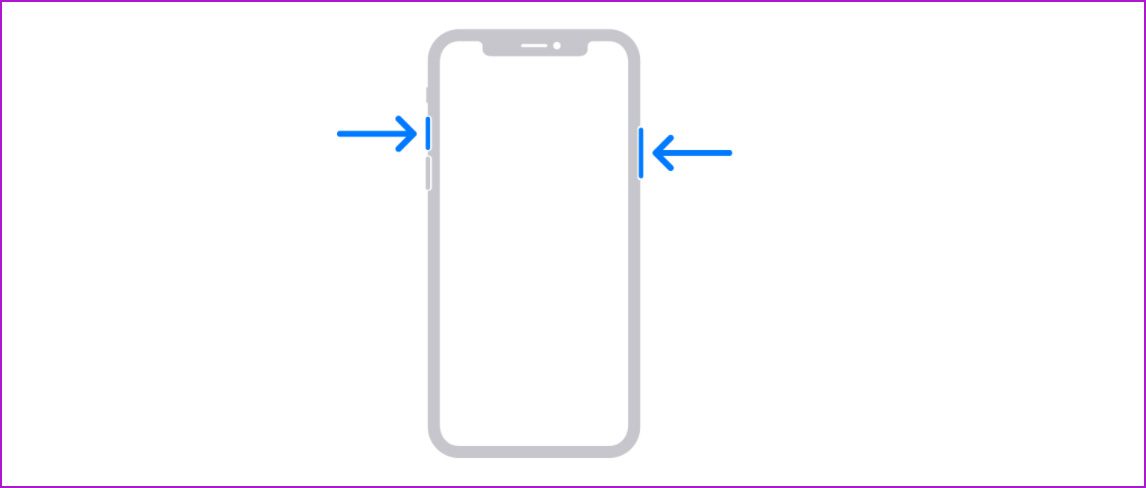
The ability to take screenshots depends on the iPhone model. If you’ve upgraded from iPhone 7 or iPhone 8 to newer models, the old trick to take a screenshot won’t work. On iPhone models with Face ID, you need to press the side button and the volume up button simultaneously. Quickly release them, and a screenshot thumbnail will appear at the bottom.
If you are still using an iPhone model with the Home button, you need to press the side button and the home button at the same time to take a screenshot. When users upgrade from an old iPhone to a new gesture-based iPhone model, they keep hitting the wrong buttons to take screenshots.
2. Press the Required Buttons at the Same Time
We have seen many users keep pressing the power and volume up buttons at different times to take a screenshot. Based on input, you will either end up locking the phone or increasing the volume level. You need to press the required buttons at the same time and quickly release them to take a screenshot successfully.
3. Force Restart iPhone
If your iPhone isn’t responding to your inputs, you need to force restart the iPhone. Press and quickly release the volume up button, do the same for the volume down button, and then press and hold the power button. Release the button when the Apple logo appears.
This trick won’t work with iPhone 7 users though. They need to press and hold the volume down and power button at the same time to force restart the iPhone.
4. Check Device Storage
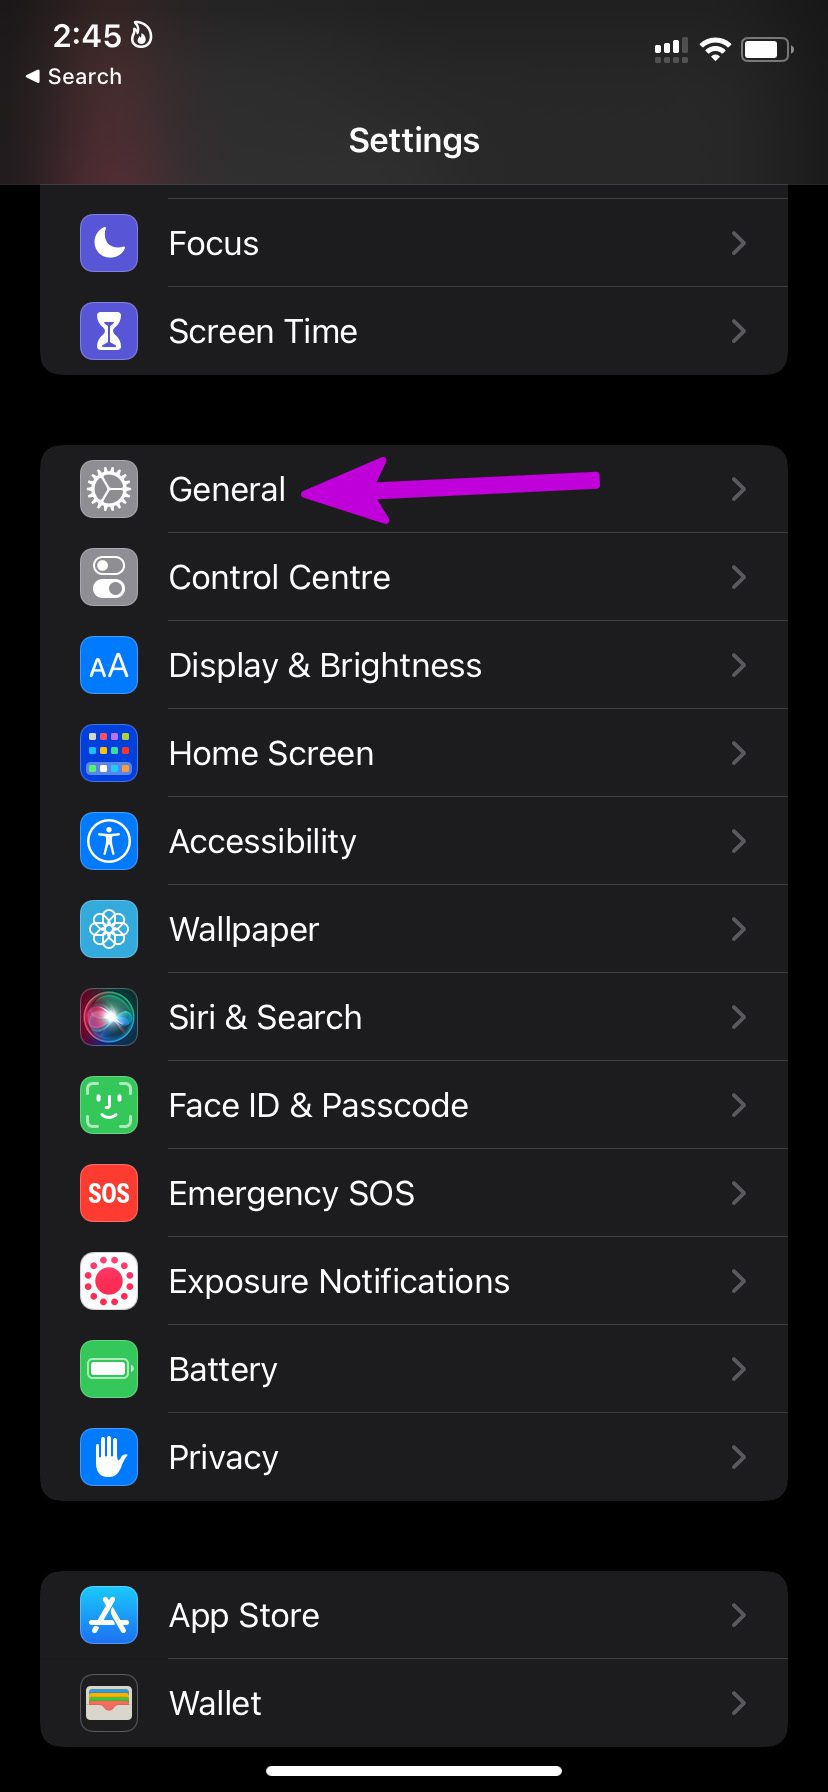
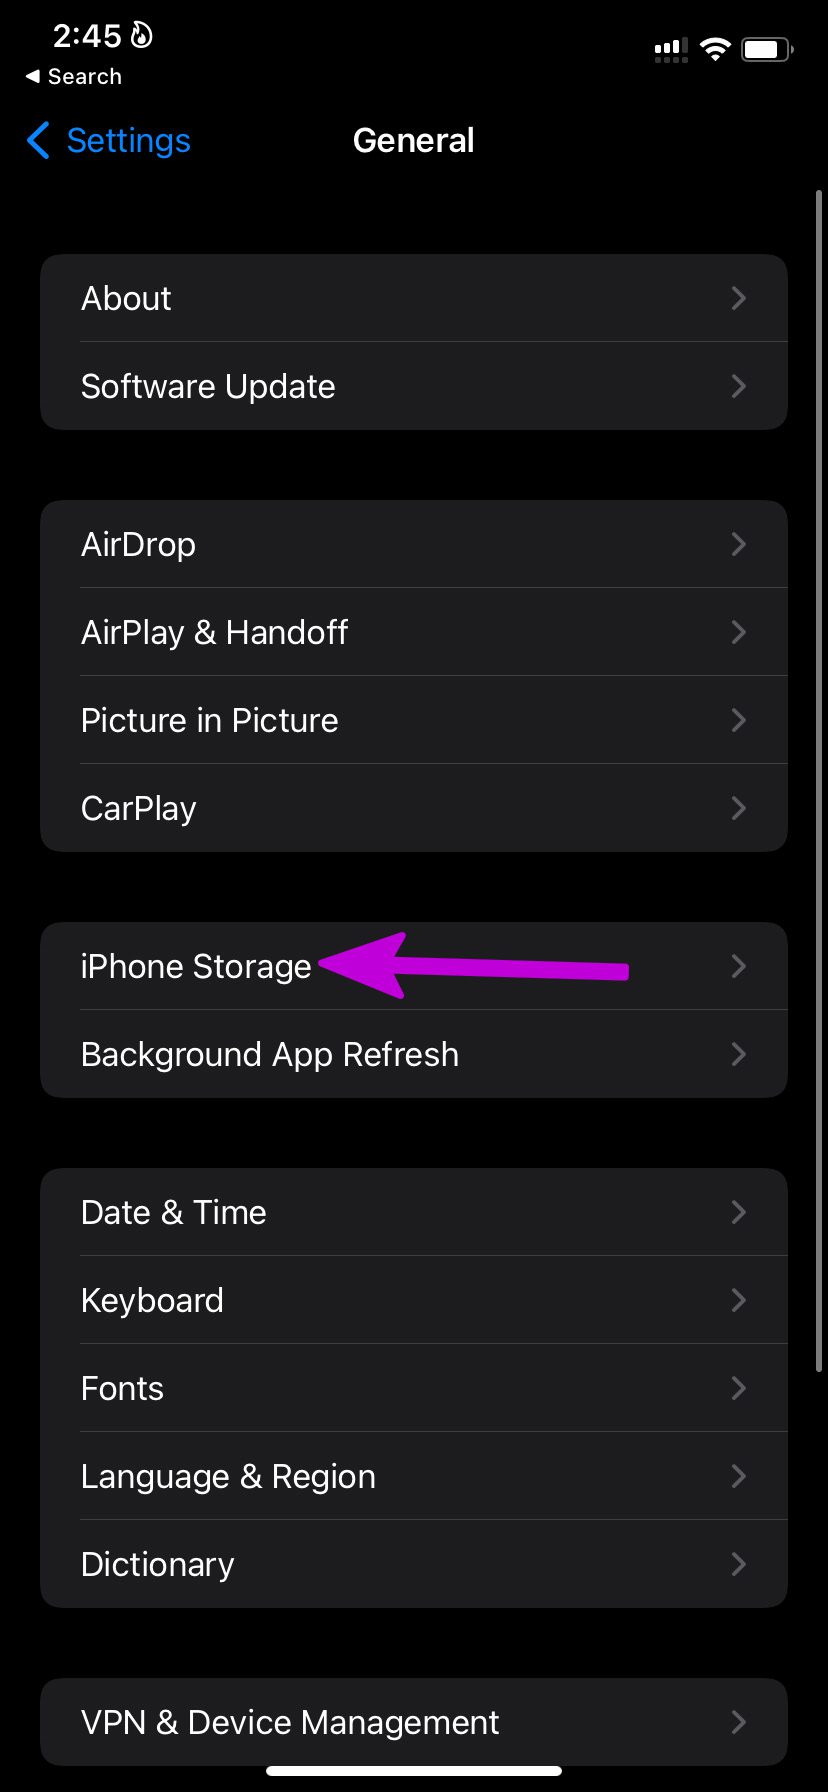
Are you dealing with low device storage on iPhone? You might be able to take a screenshot, but the same won’t appear in the Photos app. You need to check the remaining device storage on iPhone and optimize it. Step 1: Open Settings on iPhone. Step 2: Go to the General menu and select iPhone Storage.
Step 3: Check remaining storage, and if you are indeed working low storage, you can enable optimize photos to upload media to the iCloud platform.
5. Screenshots Won’t Work in Certain Apps
Video streaming services such as Netflix, Prime Video, etc., disable screenshot functionality in the app. Technically, you can still take a screenshot, but it will only come with a black screen. Companies implement such practices to prevent people from stealing their content. You shouldn’t get surprised when you don’t see anything while taking screenshots on Netflix.
6. Check Physical Buttons
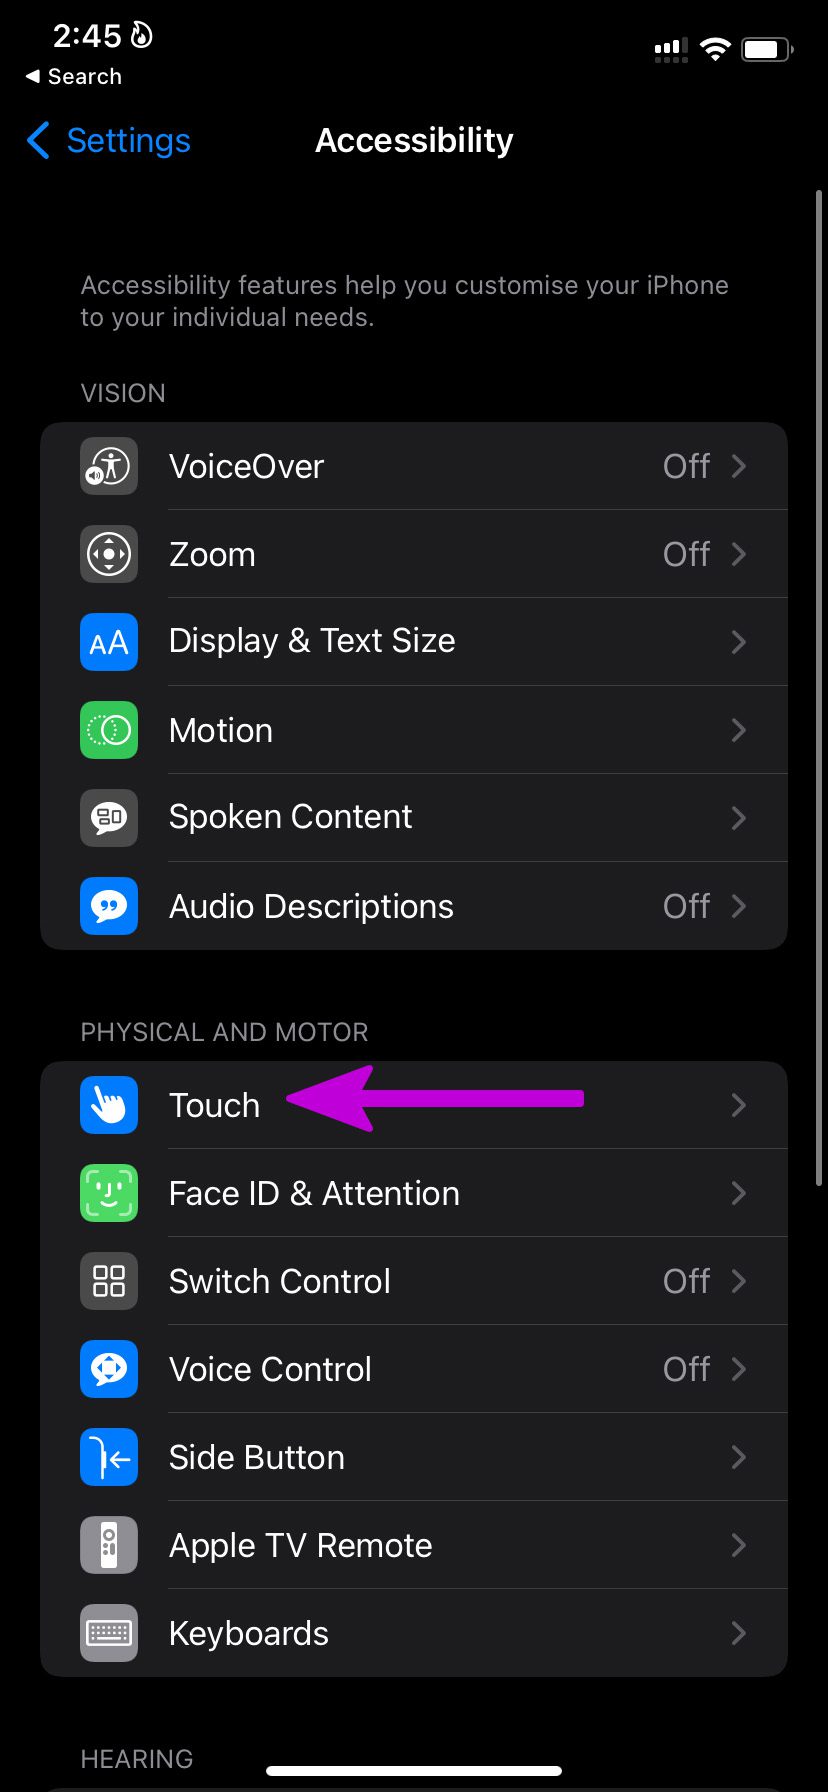
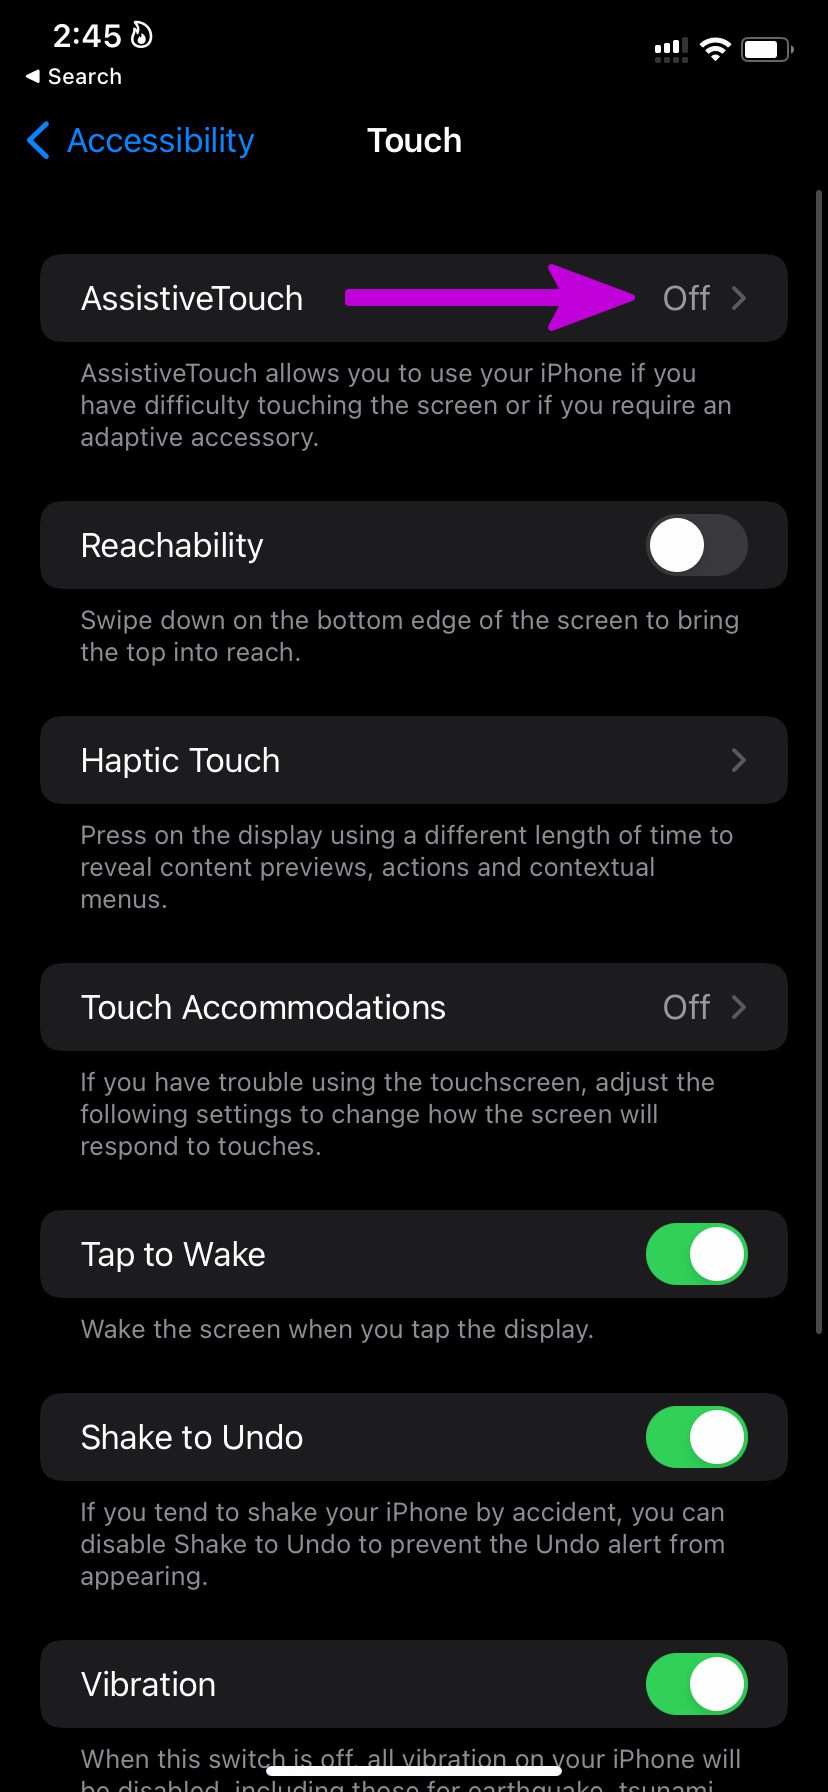
Are you working with dysfunctional home or volume buttons on iPhone? No matter what trick you try, you won’t be able to take screenshots on your iPhone. The issue may arise after you accidentally drop your iPhone on a hard surface. Apple offers another way to take screenshots as well. You’ll need to use assistive touch to enable screenshot functionality. Step 1: Open Settings on iPhone. Step 2: Go to the Accessibility menu.
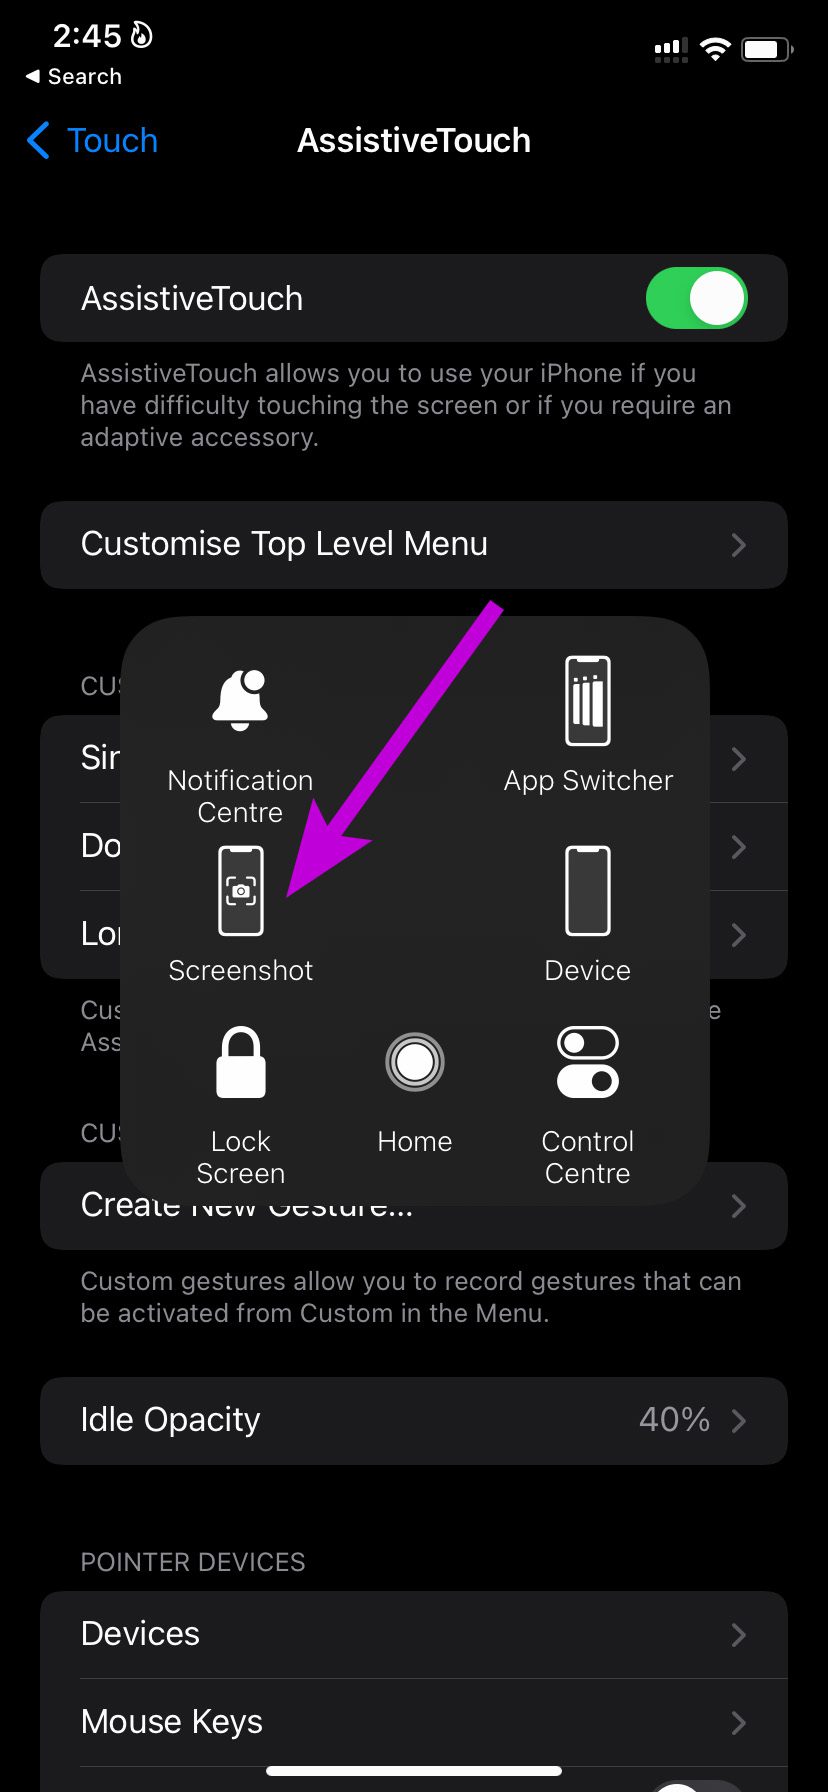
Step 3: Select Touch and enable AssistiveTouch from the following menu. You will see a virtual AssistiveTouch icon appearing on the iPhone. The menu consists of screenshot functionality as well. Whenever you want to take a screenshot, you can tap on AssistiveTouch and select Screenshot. You no longer need to rely on physical buttons to take a screenshot on your iPhone.
7. Use Gestures to Take Screenshot
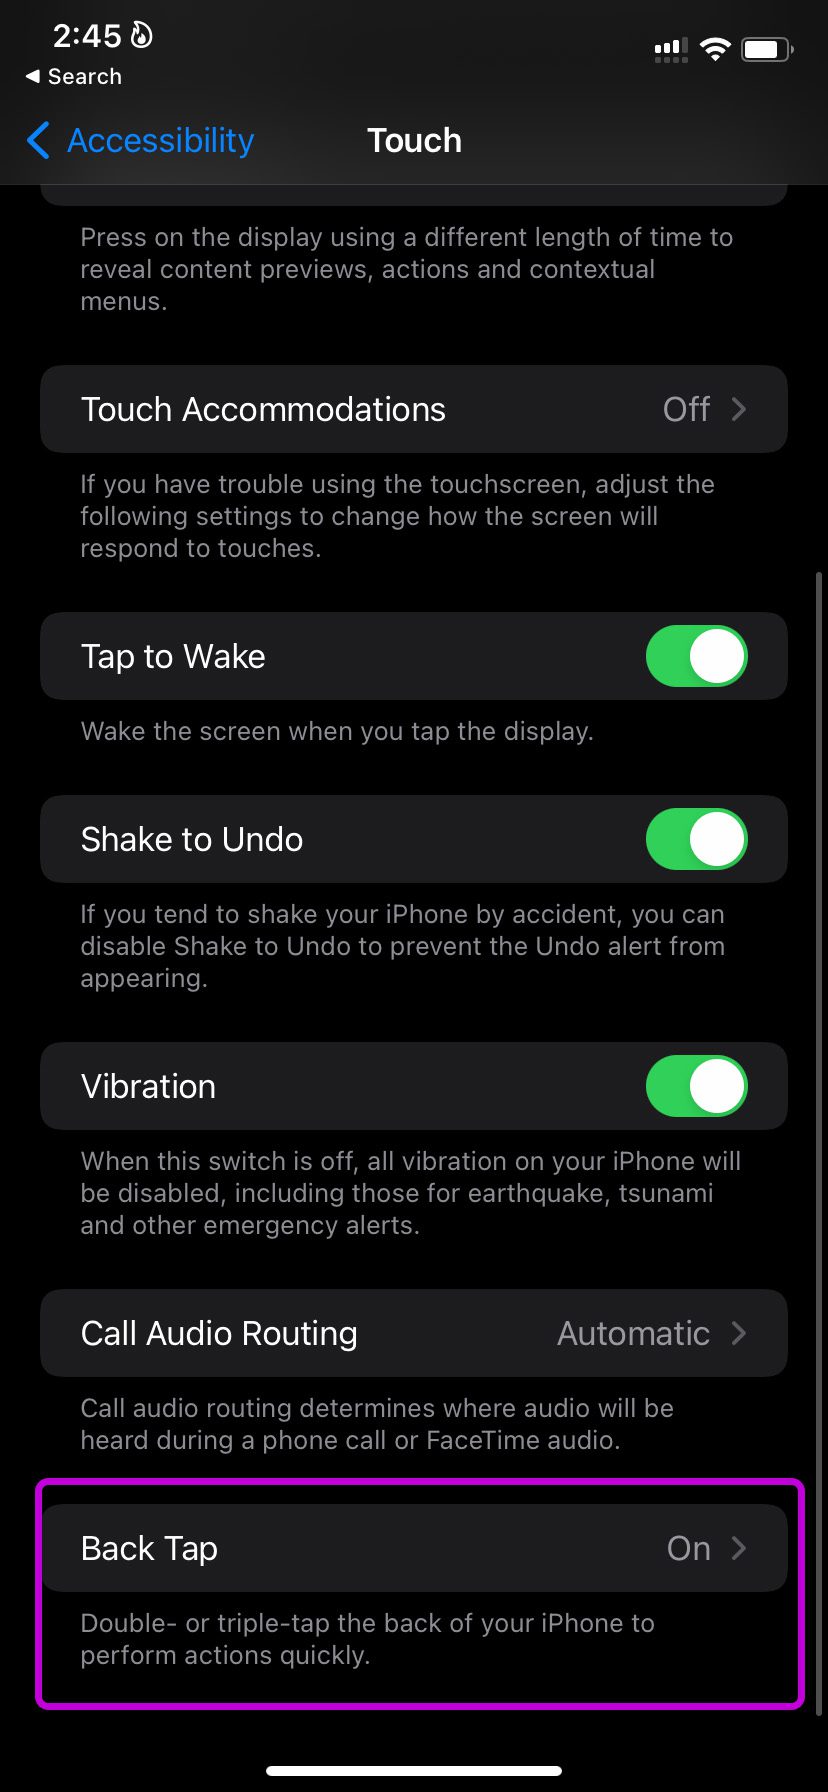
Some may not prefer to keep the AssistiveTouch enabled all the time. It’s a constant distraction on your iPhone screen. You can use gestures to take a screenshot on your iPhone as well. Here’s how. Step 1: Open Settings on iPhone. Step 2: Go to Accessibility and select Touch. Step 3: Scroll down and select Back Tap.
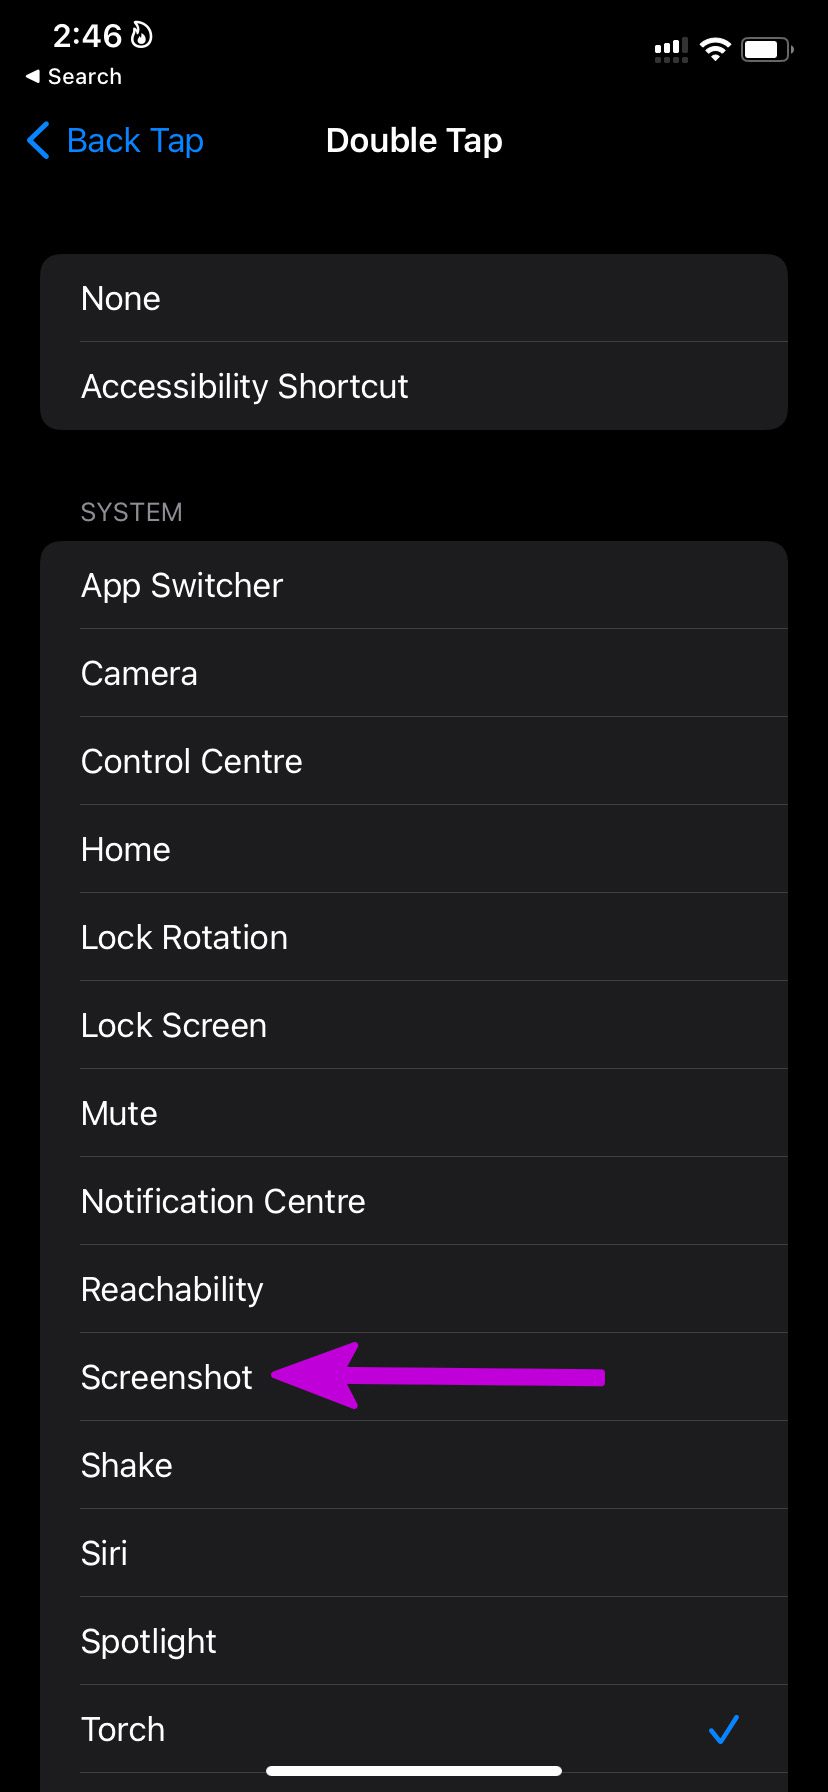
Step 4: Select Double Tap or Triple Tap and ask the gesture to take a screenshot from the following menu. You can now simply double-tap or triple-tap at the back to take a screenshot on your iPhone.
Start Taking Screenshots on iPhone
It’s quite easy to take a screenshot on iPhone. The functionality not working on iPhone may force you to use non-conventional methods to get the job done. Which trick worked for you to fix the issue? Share your findings in the comments below. The above article may contain affiliate links which help support Guiding Tech. However, it does not affect our editorial integrity. The content remains unbiased and authentic.

