That could happen due to several reasons and can leave you clueless. In this pset, we’ve listed methods to fix Apple Notes not syncing between iPhone and Mac. As a good practice, we recommend you check that your devices are running the latest version of iOS and macOS respectively.
1. Check for the Same Apple ID on Both Devices
Your iCloud account does the job of storing your notes and making them available on your Apple devices. If the iPhone notes are not syncing, you should start by checking whether you are using the same Apple ID on the iPhone and Mac. For clarity, Apple ID and your iCloud ID could be different. Follow these steps to check that.
On iPhone
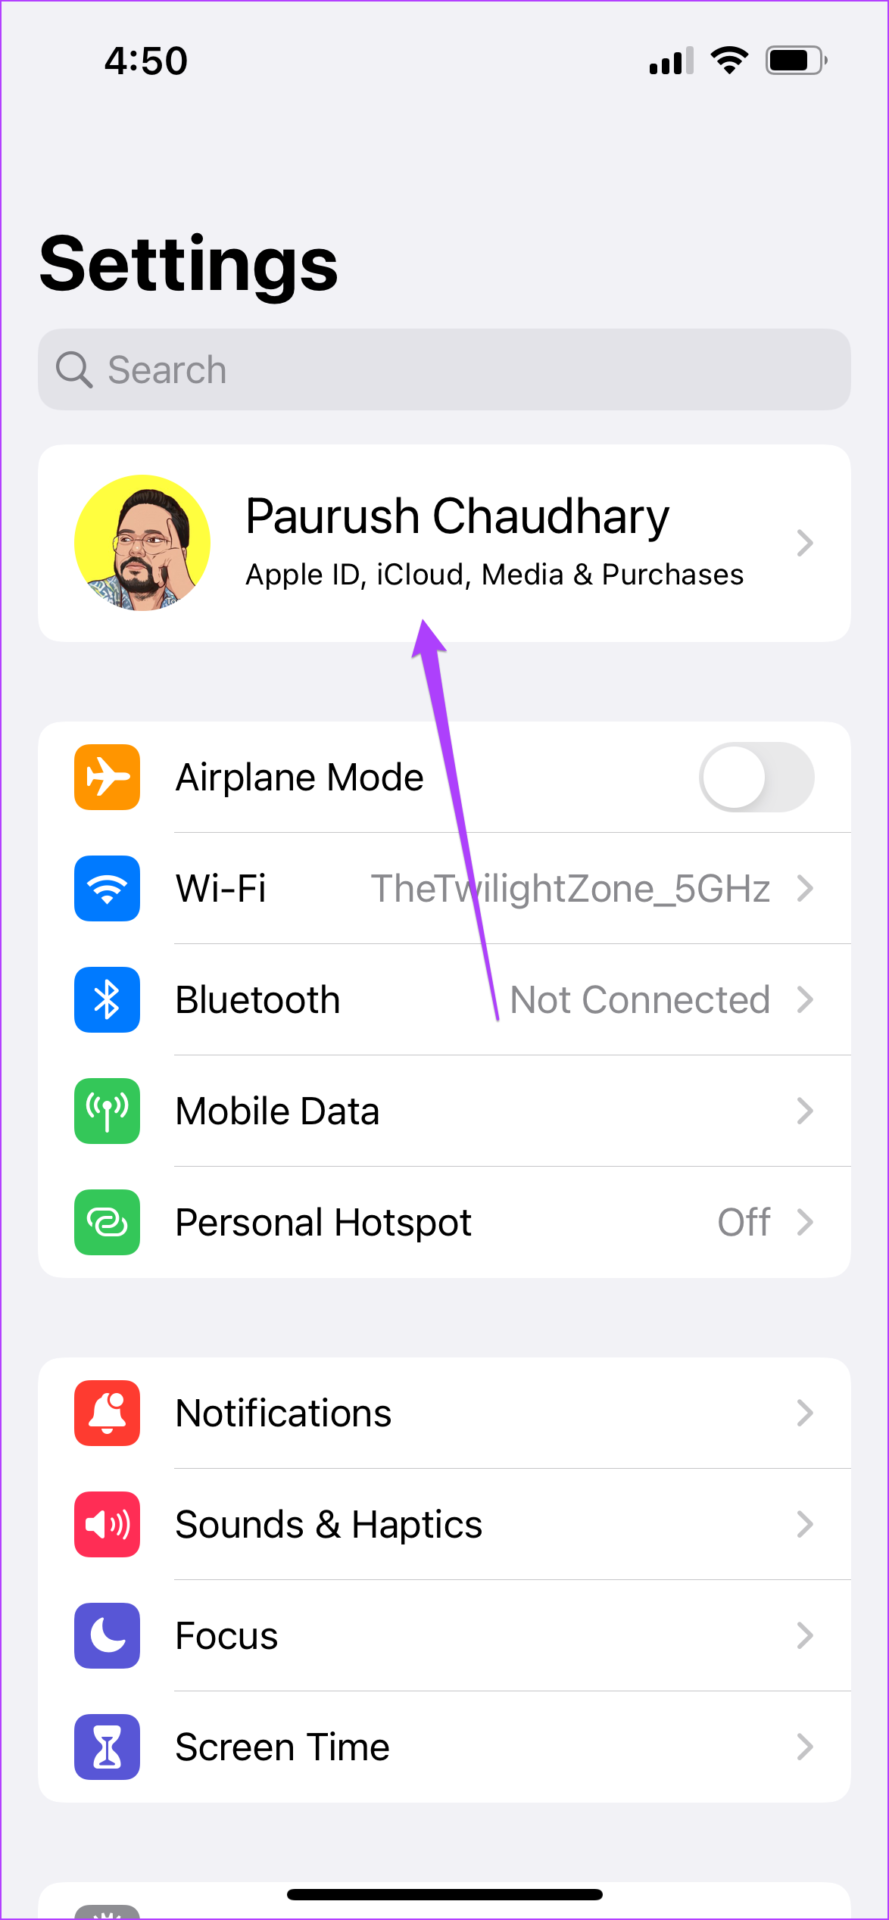
Step 1: Open the Settings app on your iPhone.
Step 2: Tap on your profile name at the top.
Your Apple ID appear under your name.
On Mac
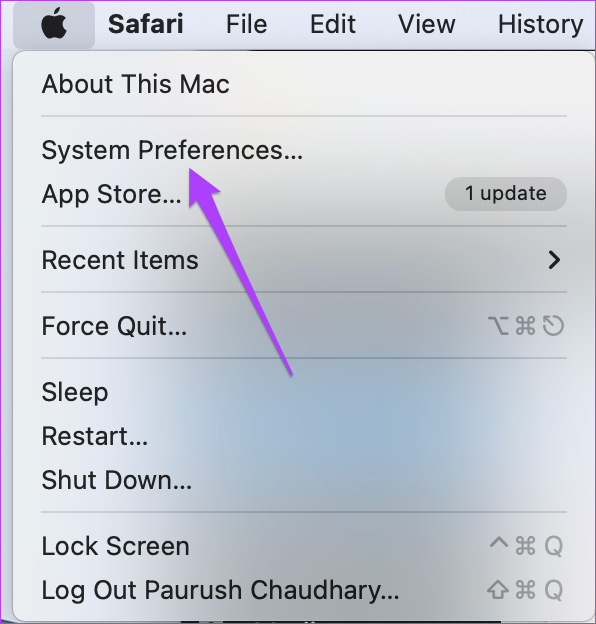
Step 1: Click on the Apple icon at the top left corner.
Step 2: Select System Preferences from the dropdown menu.
Step 3: Click on the Apple ID icon.
Your Apple ID will appear on the left-side below your profile name.
2. Avoid Storing Notes Locally on iPhone or Mac
While you get the option to store notes locally on your iPhone, syncing them with your Mac only makes things better. It prevents syncing important notes between your iPhone and Mac. It’s worth checking if you’ve enabled this feature.
Stop iPhone From Storing Notes Locally
Step 1: Launch the Settings app on your iPhone.
Step 2: Scroll down and select Notes.
Step 3: Scroll down to find the option of “On My iPhone” Account. If this toggle is enabled, that means all the notes you’ve created will appear on the iPhone after this toggle was active. It won’t affect the notes you’ve already synced with your Mac over iCloud.
Step 4: Top on the toggle to turn off the option.
After this, all the notes on your iPhone will sync with the ones on your Mac.
Stop Mac From Storing Notes Locally
Step 1: Open the Notes app on your Mac.
Step 2: Click on Notes in the top-left corner on the menu bar and select Preferences.
Step 3: Check if the box for ‘Enable On My Mac account’ is unchecked. If it is enabled, you’ll need to uncheck the box.
3. Check iCloud Services for Notes on iPhone
After disabling local storage, you can check if you have enabled iCloud Services for the Notes app on your iPhone. Since your iCloud is making your notes available on every Apple device, you should definitely check this. Here’s how. Step 1: Tap on the Settings app icon to open the app.
Step 2: Tap on your profile name at the top.
Step 3: Select iCloud.
Step 4: Scroll down and enable the Notes app toggle.
On Mac
Step 1: Open the Notes app.
Step 2: Click on the Notes in the top-left on the menu bar and select Accounts.
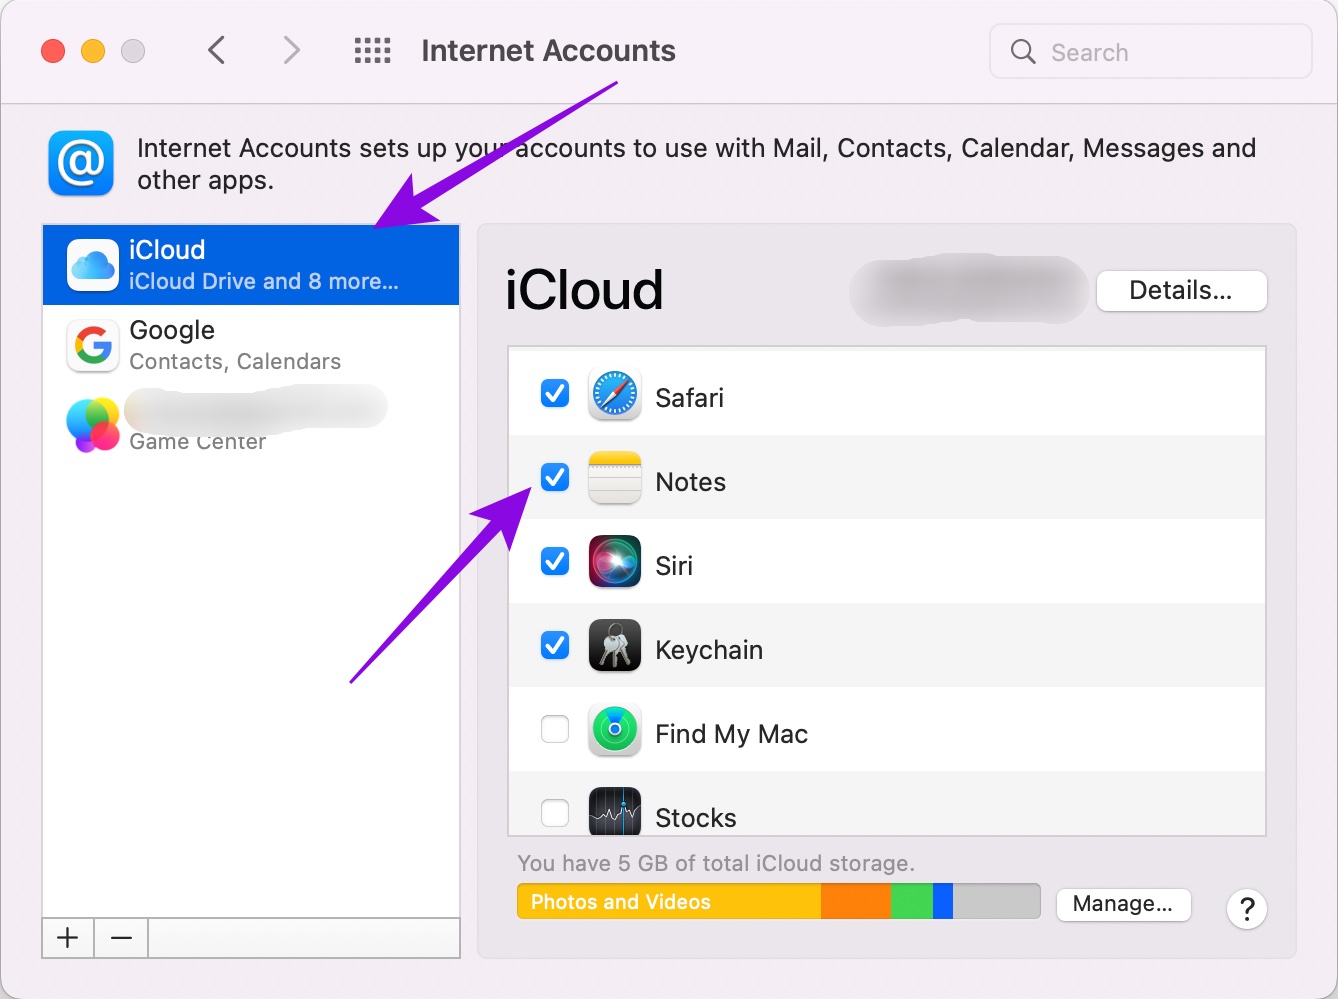
Step 3: When the Internet Accounts window opens, select iCloud from the left column. Scroll down the list to check if the box next to Notes is enabled.
Checking the sync option for Notes on iPhone and Mac will ensure that the changes on one device will reflect on the other.
4. Check Your Internet Connection
The Apple Notes sync or any other app’s data across devices is responsive to your internet speeds. If your internet connection is intermittent and keeps acting up, the sync might not take place or get stuck. To check your Internet connectivity strength, you may run a speed test on your iPhone and Mac at least 2-3 times to get an estimate. If you are using a hotspot, you should definitely check the speed of that connection. You can go to Ookla Speedtest website to run the speed test on your iPhone and Mac. Alternatively, you may use the Speed Test app on your iPhone and Mac. Get Ookla Speedtest for iPhone Get Ookla Speedtest for Mac
5. Force Quit and Restart the Notes App
If your internet speeds are good, you can force quit and restart the Notes app on your Mac. This will give the app a jumpstart on your device. Follow these steps.
On Mac
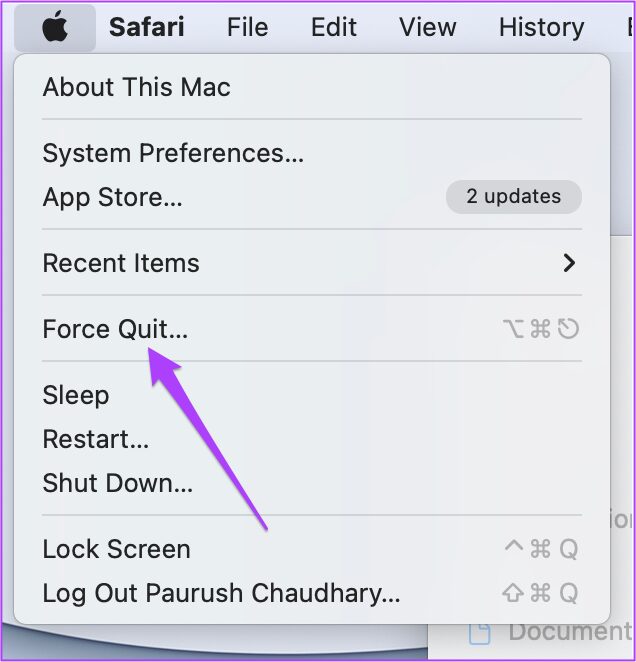
Step 1: Click on the Apple icon and select Force Quit.
Step 2: Select Notes from the list and click on Force Quit.
Step 3: Reopen the Notes app.
On iPhone
You can try doing the same on your iPhone as well. Here’s how. Step 1: From the home screen, swipe up from the bottom and hold. All apps running in the background will appear on your screen.
Step 2: Tap and swipe up the Notes app window to remove it from the background.
Step 3: Reopen the Notes app.
6. Turn Off VPN
Some iCloud services tend not to work properly while using a VPN. If you have turned on VPN service on your iPhone or Mac, it’s worth checking if switching it off temporarily speeds up the Notes sync.
7. Restart Your iPhone and Mac
Just like restarting the app, you can reboot your iPhone and Mac. If it’s been a while since you’ve done that, it’d certainly help. Then open the Notes app on the iPhone and Mac to check if all the notes sync.
8. Transfer Notes From iPhone to Mac Using AirDrop
If you are still facing issues despite trying the above solutions, we suggest transferring your notes via AirDrop. Please ensure that AirDrop has been enabled on your Mac. Here’s how you can transfer notes from iPhone to Mac. Step 1: Open the Notes app on your iPhone.
Step 2: Tap on the note that you wish to send. Step 3: Tap on the three dots at the top right corner.
Step 4: Select Share a Copy from the list of options.
Step 5: Tap on your Mac system name above the AirDrop logo to share the note.
AirDrop is the quickest way to transfer your notes from iPhone to Mac.
Sync Notes Between iPhone and Mac
Note syncing is a helpful feature for Apple device users. You can access and edit the same note from your iPhone, iPad, or Mac. This multi-device support is what mostly draws folks toward the Apple ecosystem. The above article may contain affiliate links which help support Guiding Tech. However, it does not affect our editorial integrity. The content remains unbiased and authentic.


