However, you must know that this will clutter your inbox. But with proper settings and filters in place, this can be a great help. In this guide, we will teach you how to automatically CC or BCC yourself in Outlook and Gmail. But first, let’s start with the basics.
What Do CC and BCC Mean in Email
CC and BCC stand for carbon copy and blind carbon copy, respectively, and are email fields that allow you to send a copy of an email to additional recipients, even yourself. CC is useful when you want to send a copy of an email to someone for informational purposes or to keep them in the loop, while BCC is useful for the same reasons but is more discreet since other recipients can’t see the BCC recipients in the email header.
How to Automatically CC or BCC Yourself in Outlook
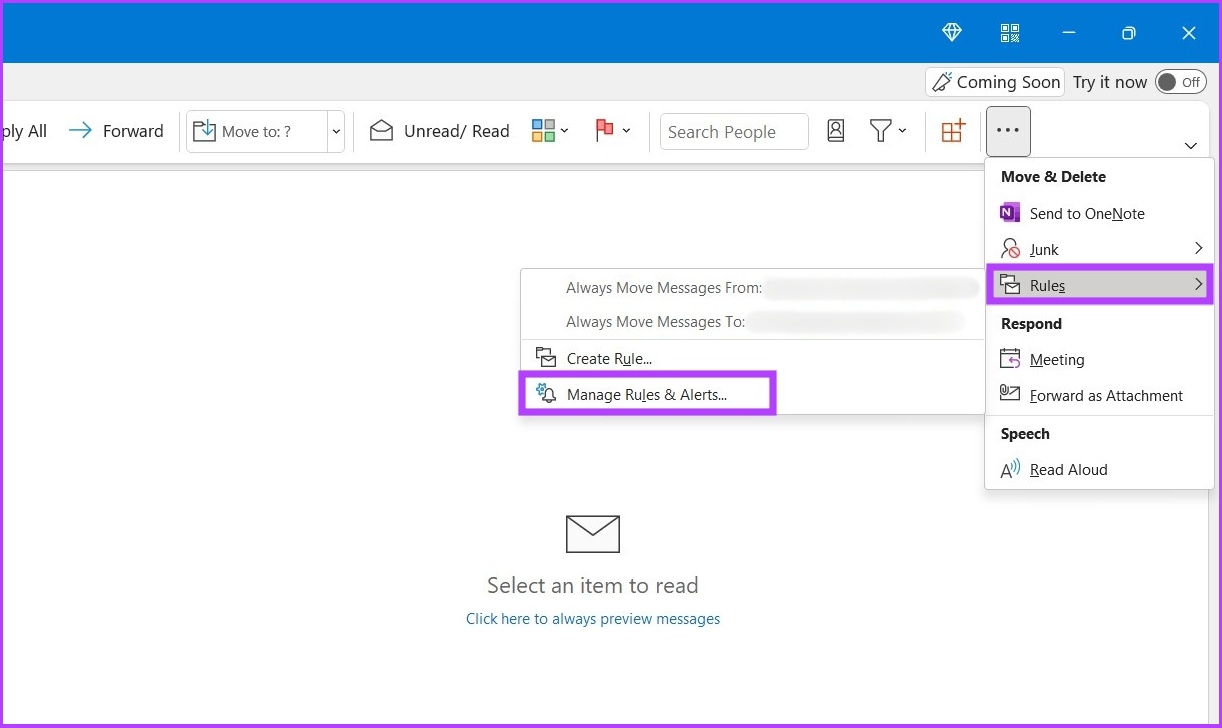
To ensure that you always have a copy of every email you send in Outlook, follow the below steps to automatically CC or BCC yourself in all outgoing emails. Here’s how: Step 1: Open Outlook and click on the three-dot menu.
Step 2: Now, go to Rules and select ‘Manage Rules and Alerts’ in the drop-down menu.
Step 3: Click on New Rule.
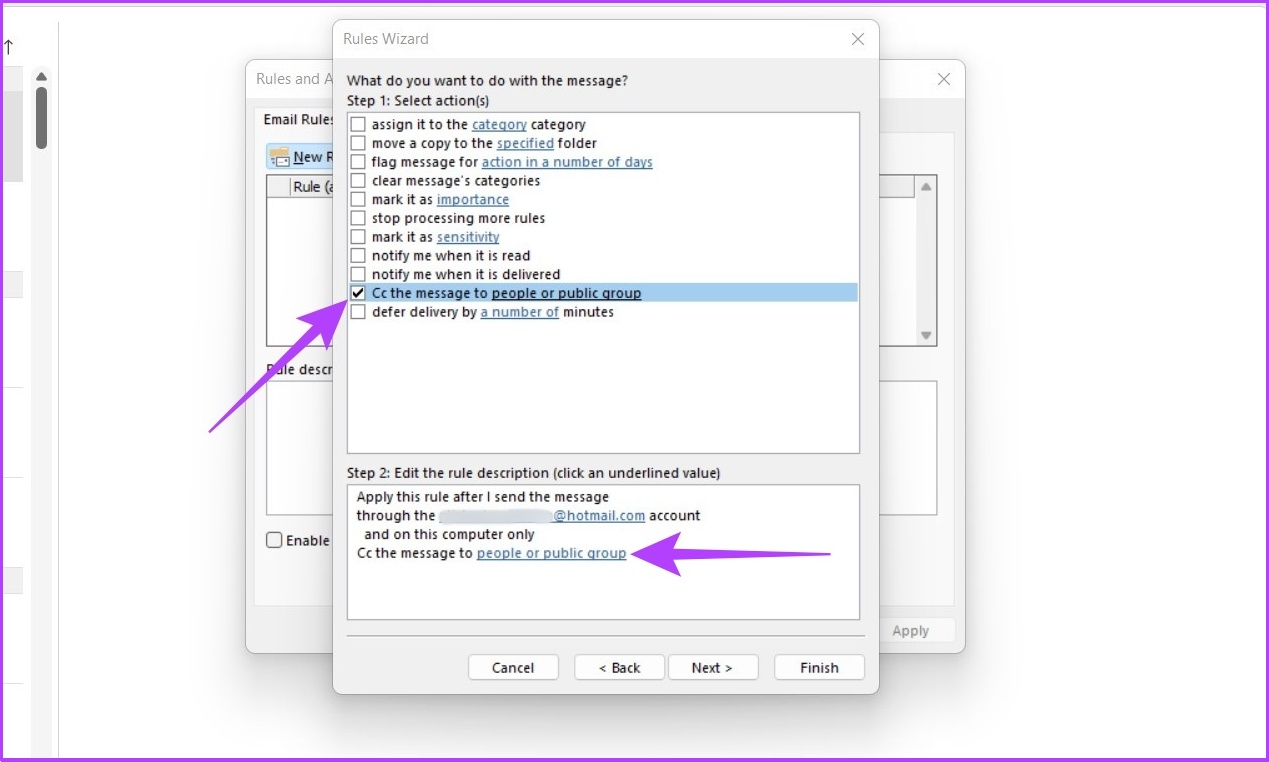
Step 4: Under ‘Start from a blank rule’, click on ‘Apply rule on messages I send’ and click Next.
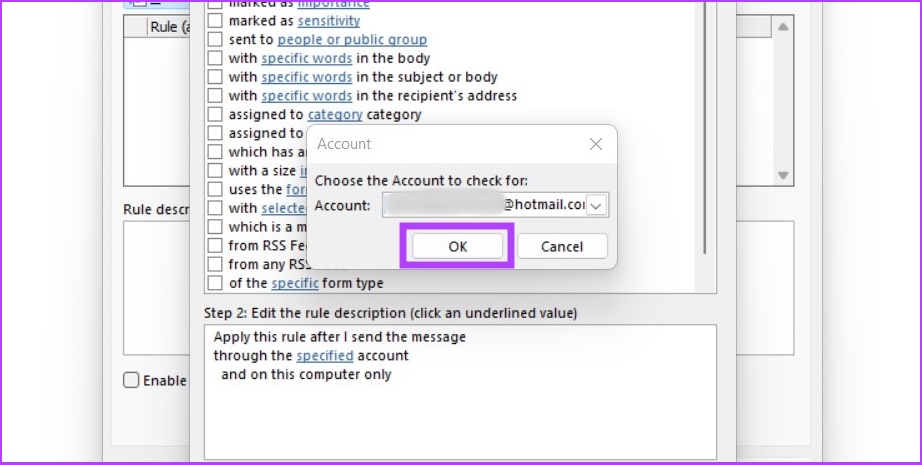
Step 5: Check the box next to ‘through the specified account’ in Step 1, and click on specified in Step 2.
Step 6: Choose your email account and select OK.
Step 7: Click on Next.
Step 8: In Step 1, check the box next to ‘Cc the message to people or public group’ and click on ‘people or public group’ in Step 2. Note: To BCC an email, select ‘Move a copy to the specified folder’ in Step 1.
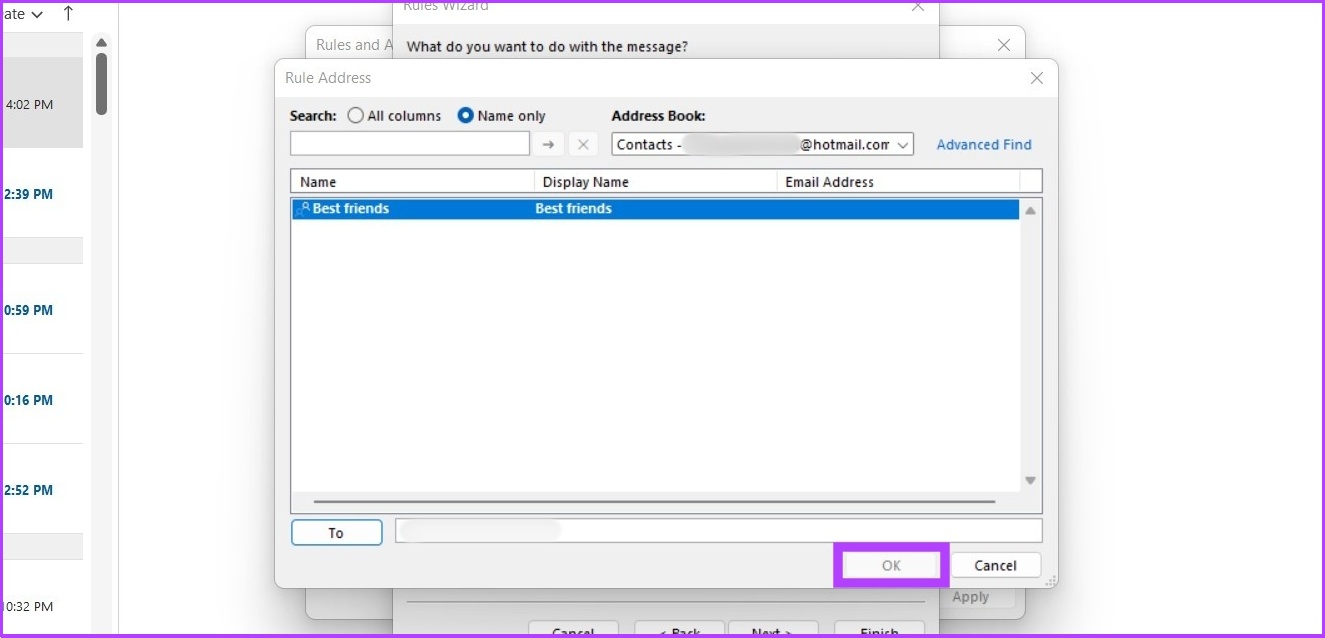
Step 9: Now, add your Email ID and click OK.
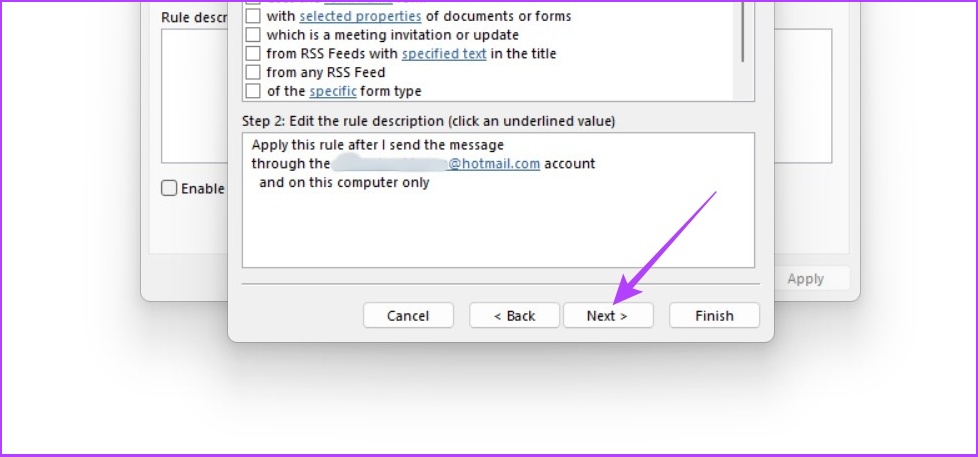
Step 10: Select the exception if you want to exclude this rule for certain emails and click on Next.
Step 11: Enter your Email ID, select ‘Turn on this rule’ in Step 2, and click Finish.
Note: To undo CC or BCC automation in Outlook, go to Rules > Manage Rules & Alerts > Under Rule, select the rule you created to automate CC and BCC > Click Delete. That’s it. You will be back to normal. Now, every time you send an email in Outlook, you’ll automatically receive a copy of it. This can be handy if you want to keep track of all the correspondence you send out. However, if don’t want to CC or BCC yourself in every email, you can simply auto-forward emails in Outlook.
How to Automatically CC or BCC Yourself in Gmail
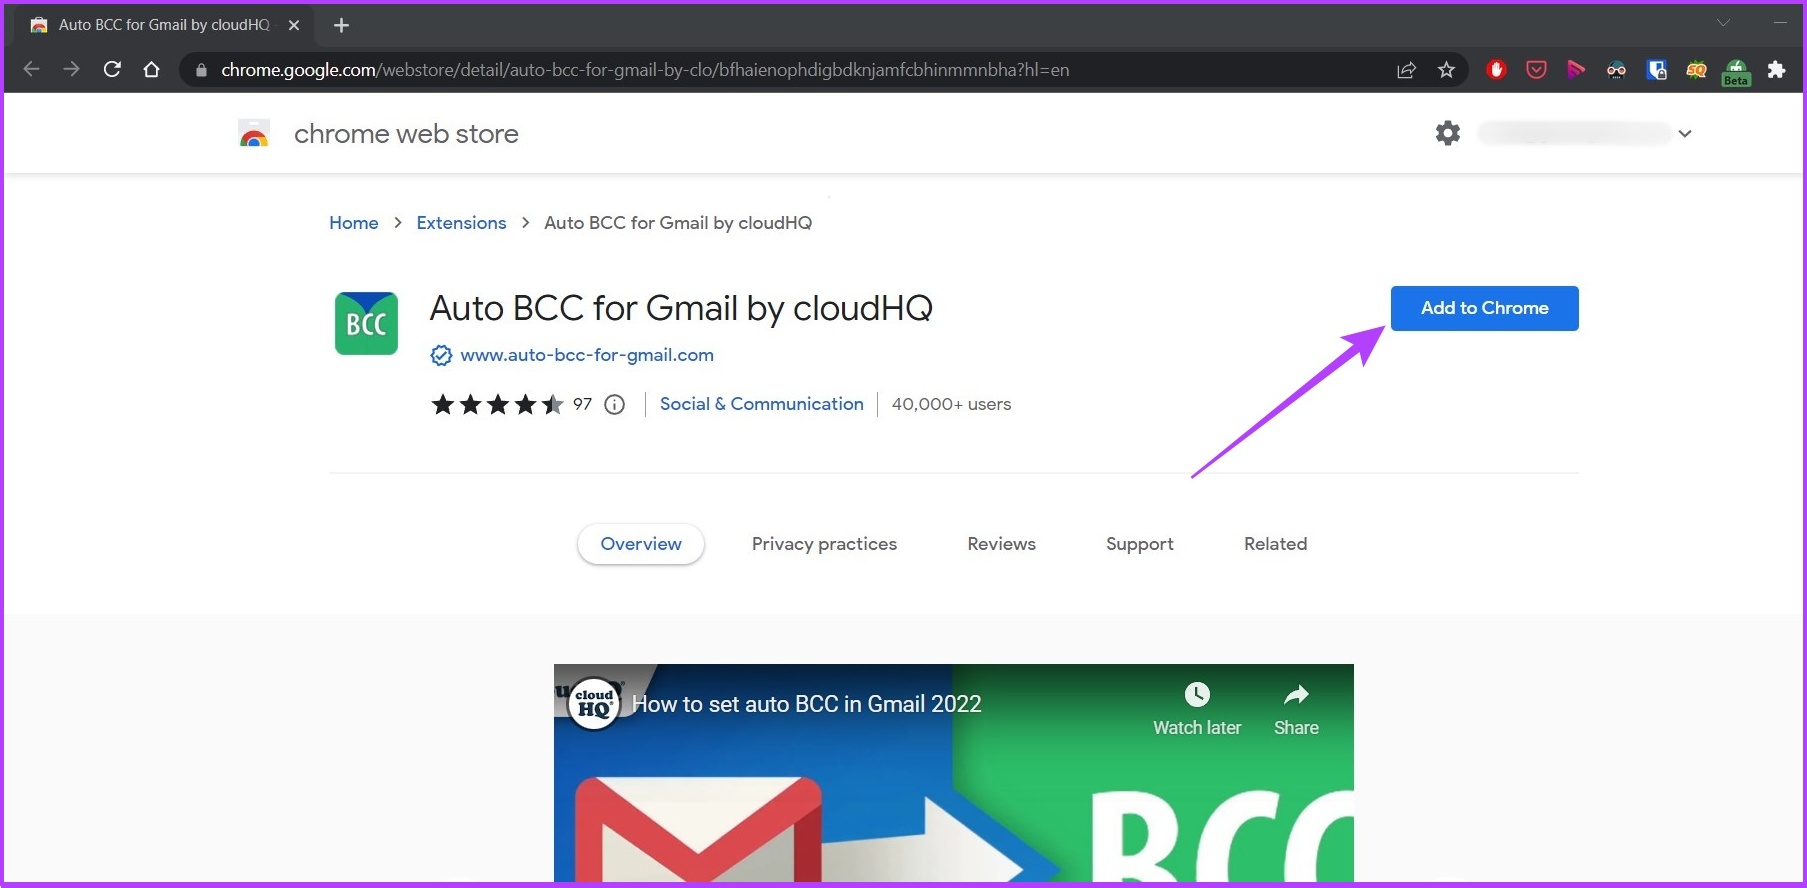
Gmail doesn’t natively support auto CC or BCC emails. So, we will be using a free browser extension called Auto BCC & Auto CC extension for Chrome. This extension will allow us to set rules to automatically CC or BCC multiple Gmail accounts or your email address when you go to compose, reply, or forward emails. Step 1: Visit the below link and click on Add to Chrome to download the Chrome extension. Download Auto BCC for Gmail Extension
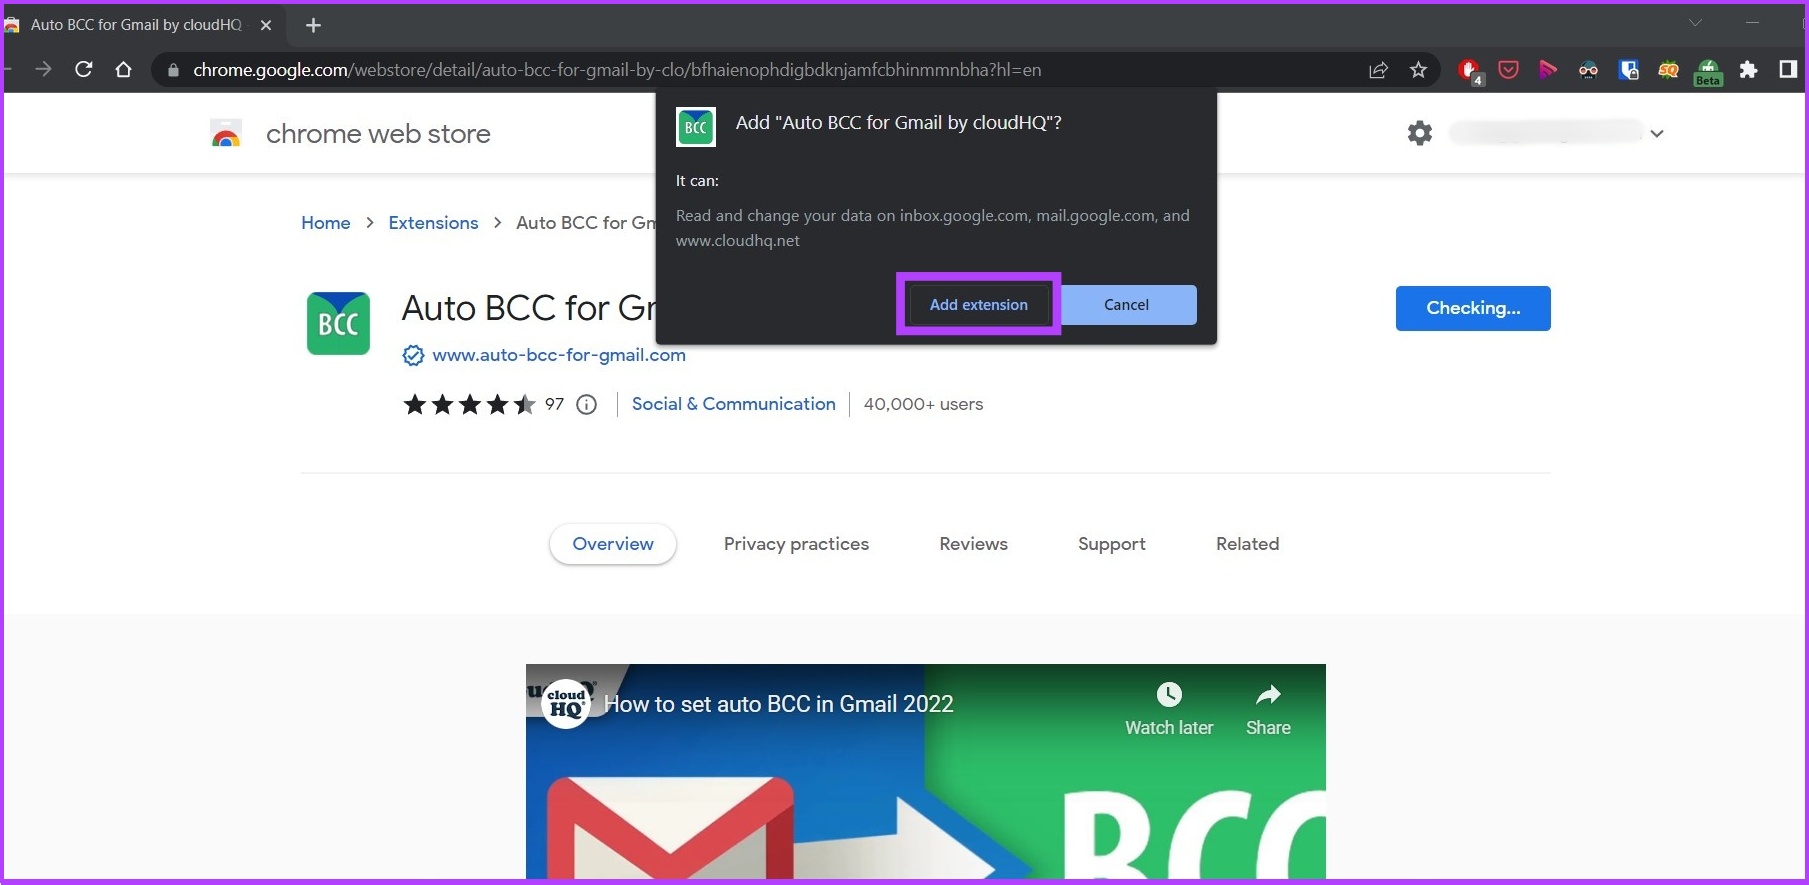
Step 2: Click on Add extension to add this extension on Chrome.
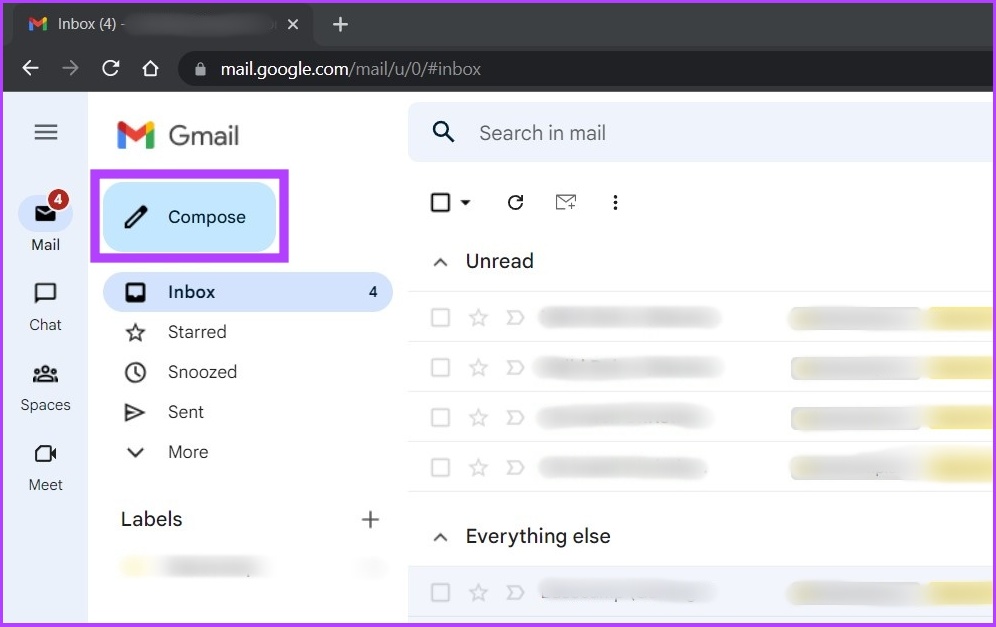
Step 3: Now, open Gmail on Chrome and click on the Compose button.
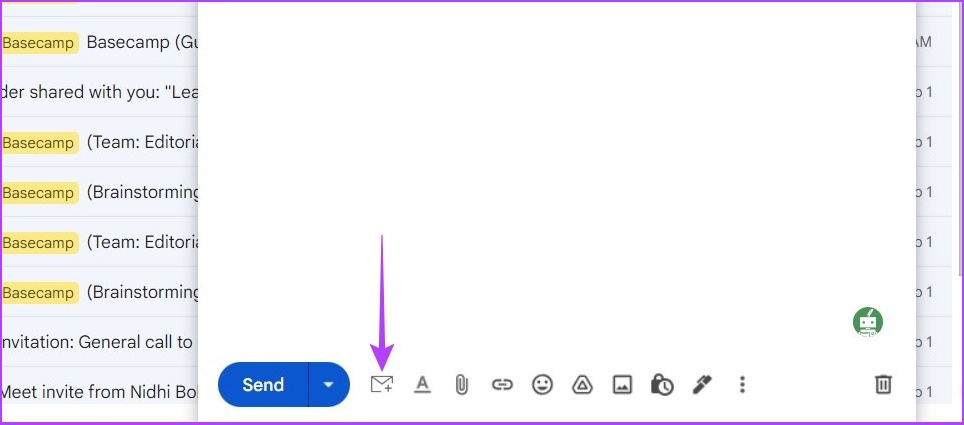
Step 4: Click the envelope icon right next to the send button.
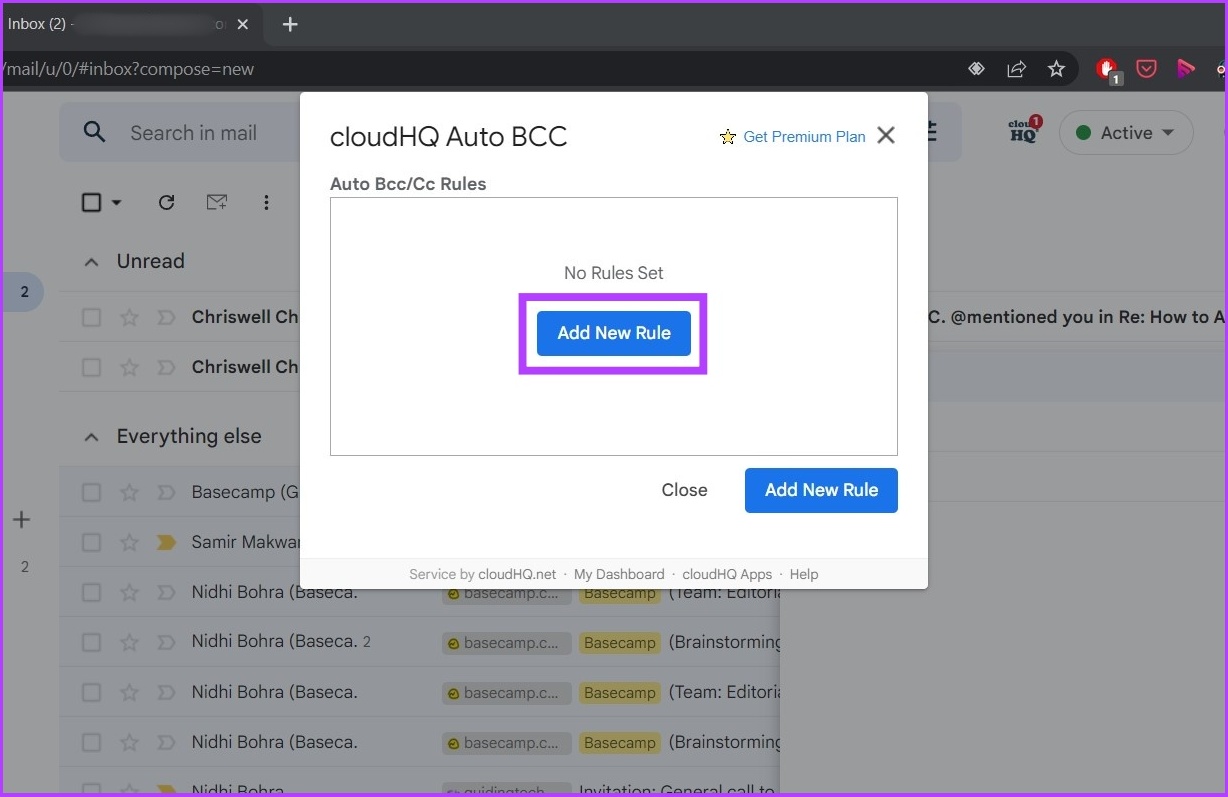
If you want to create a group on Gmail, then our guide on how to create an email group in Gmail will come in handy. Step 5: Click on ‘Add New Rule.’
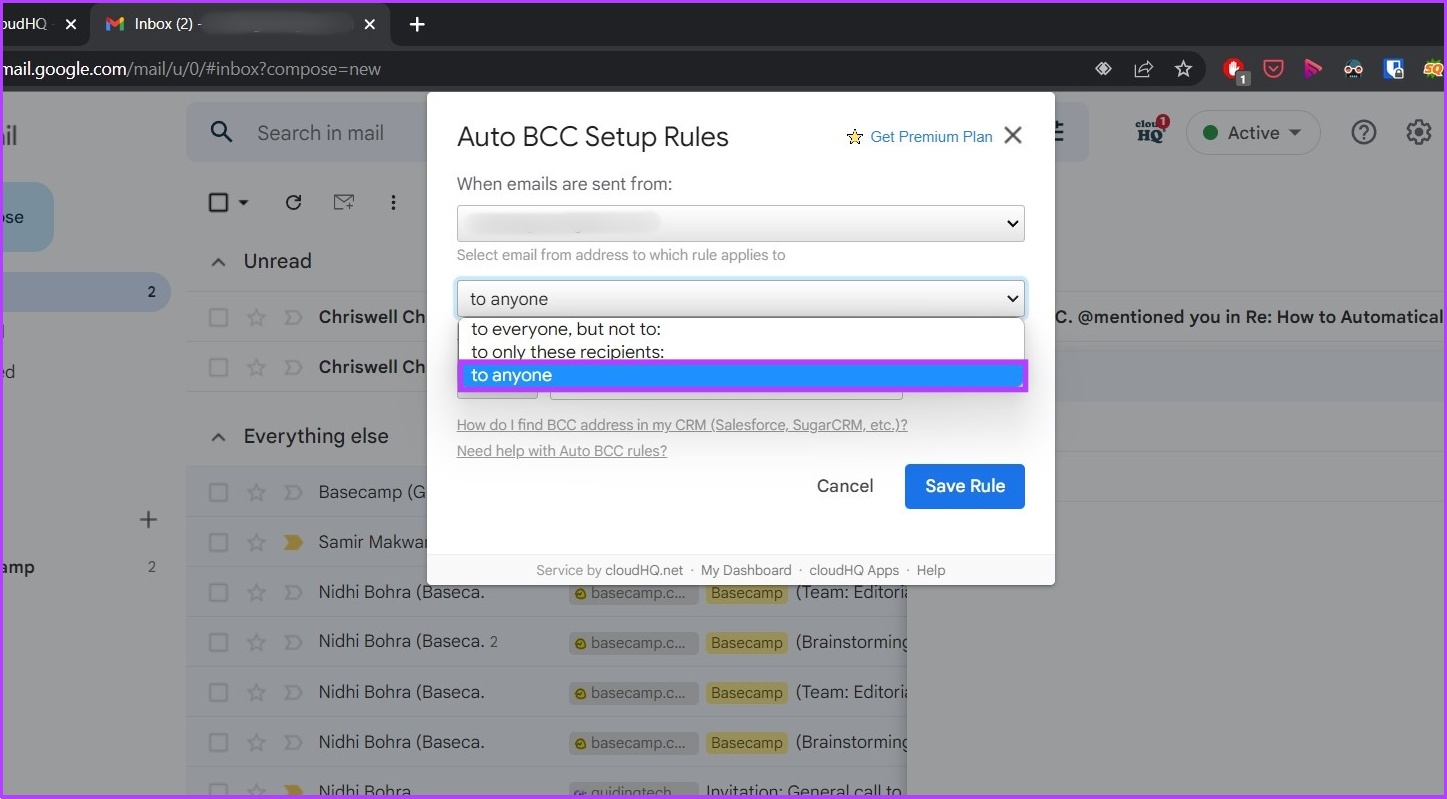
Step 6: Under ‘When emails are sent from,’ you should see your email already filled in. In the drop-down menu beneath it, select to anyone.
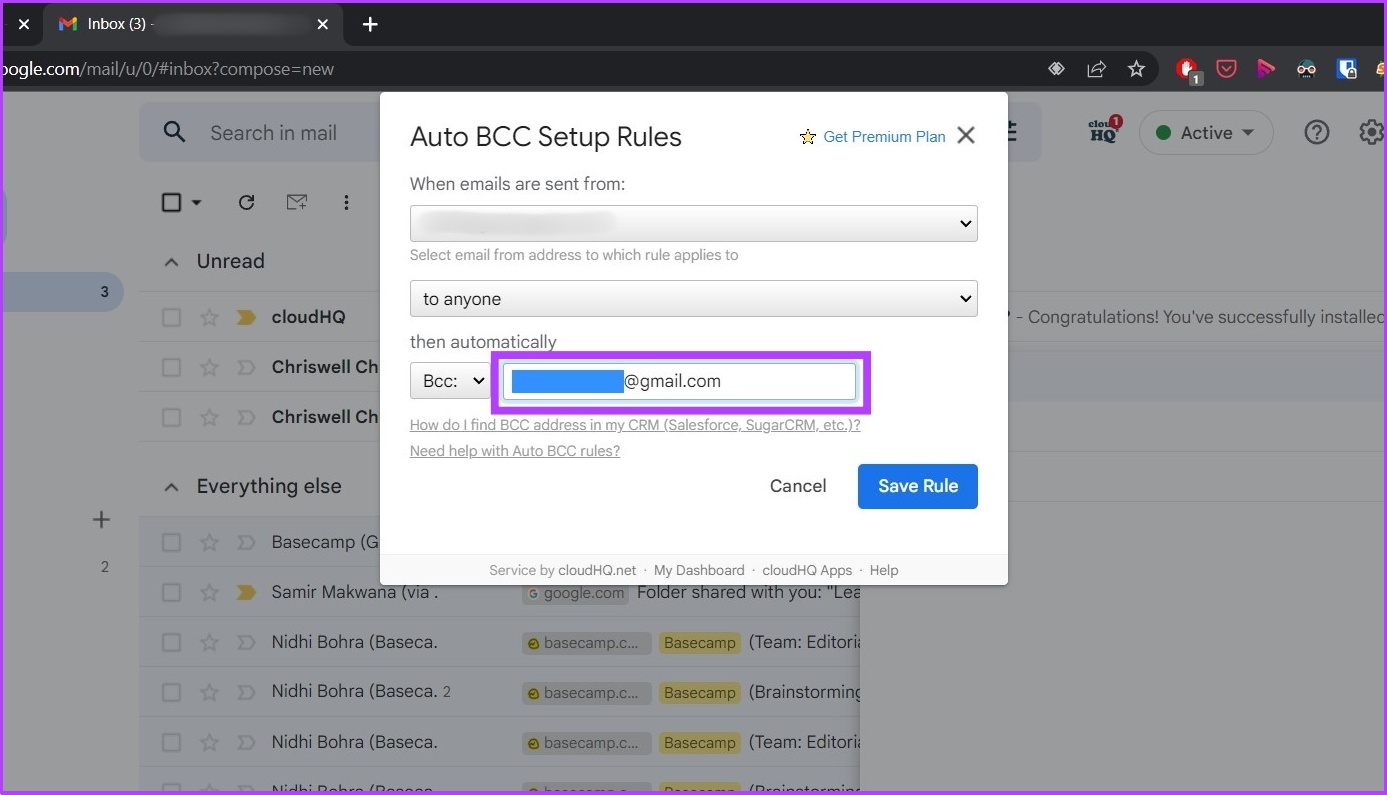
Step 7: Select BCC or CC (whatever you prefer) in the drop-down list under then automatically.
Step 8: Now, enter your email address.
Step 9: Click Save Rule.
That’s it. Click on Close and compose your email as normal.
How to Turn Off Auto CC or BCC in Gmail
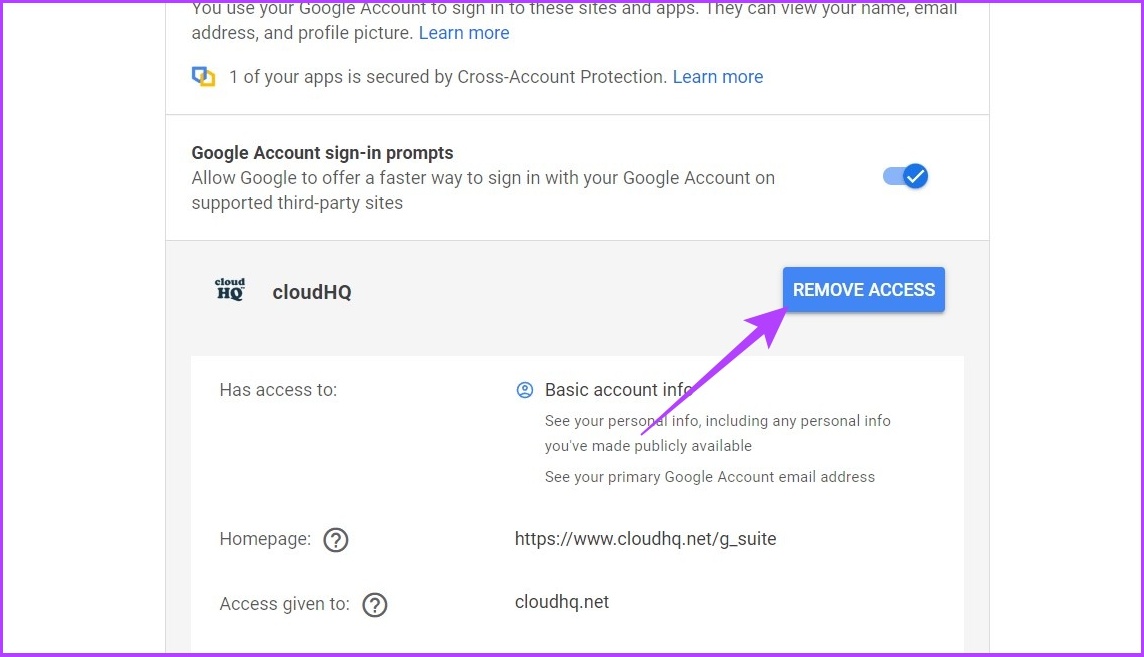
If you no longer want to CC or BCC, you can remove your account access to the extension, and uninstall it. Here’s how to do it. Step 1: Go to the link and click on the cloudHQ app. Google Account Permission Page
Step 2: Click on Remove Access.
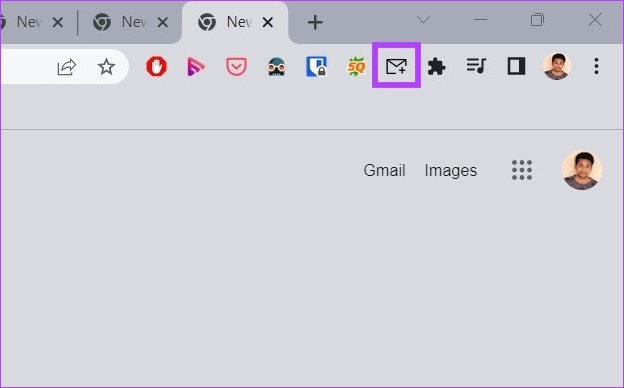
That’s it. It will revoke your account connected with the extension. Now, let’s uninstall the extension from Chrome. Step 3: Navigate to the Chrome extension panel and find the Auto BCC for Gmail Extension (envelope) icon.
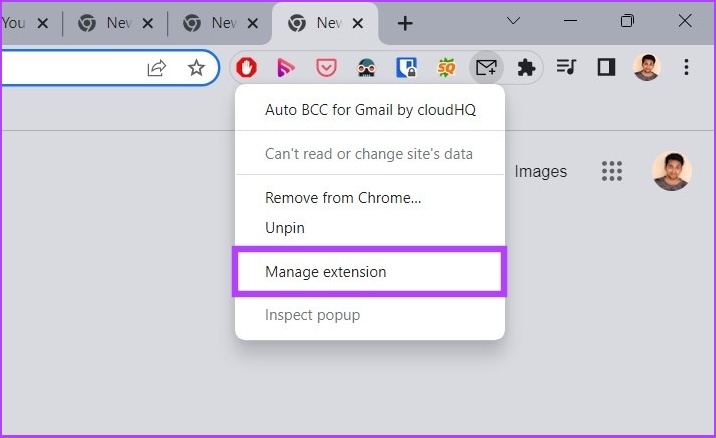
Step 4: Right-click on the extension icon and click Manage extension.
If you don’t see the extension pinned, click on the Extensions (lego button). Step 4: Scroll down to find the Remove extension option.
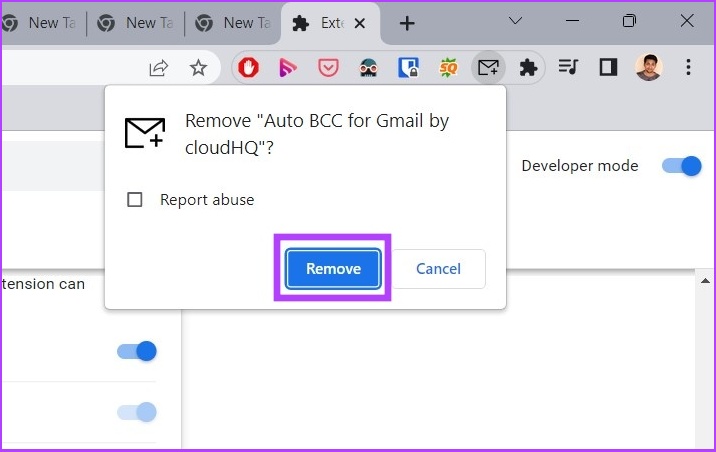
Step 4: You will be prompted with a dialog box, choose Remove.
Now, you have completely gotten rid of the automation extension.
Alternative Method: Use Gmail’s Auto Forwarding Feature
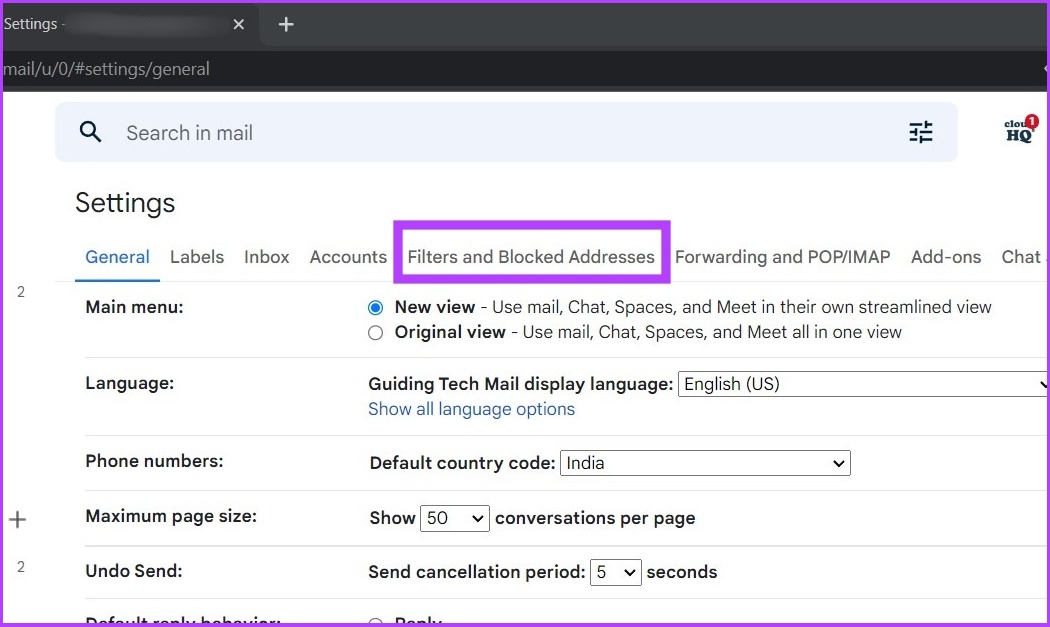
If you don’t want to give your account access to third-party extensions, you can use Gmail’s filter and forwarding feature. Follow along the below steps. Step 1: Open Gmail and go to ‘See all Settings’.
Step 2: Now, click on ‘Filters and Blocked Addresses.’
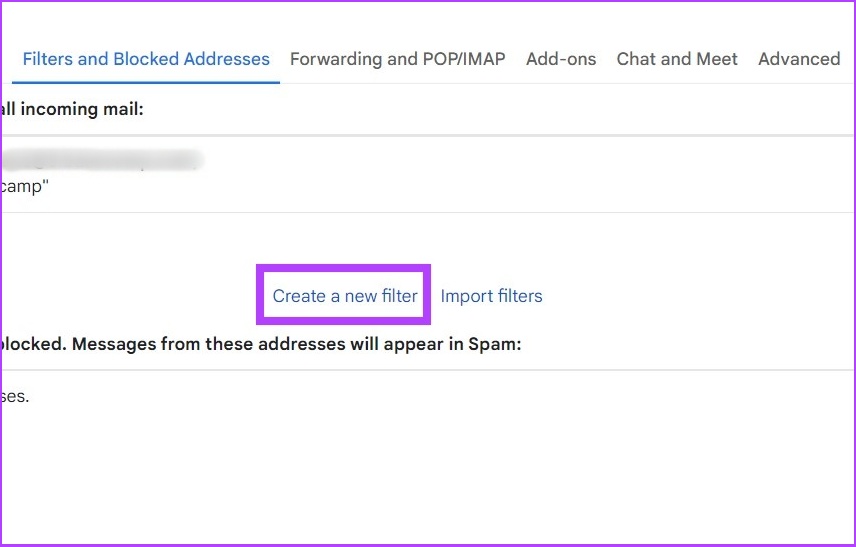
Step 3: Click on ‘Create a new filter’.
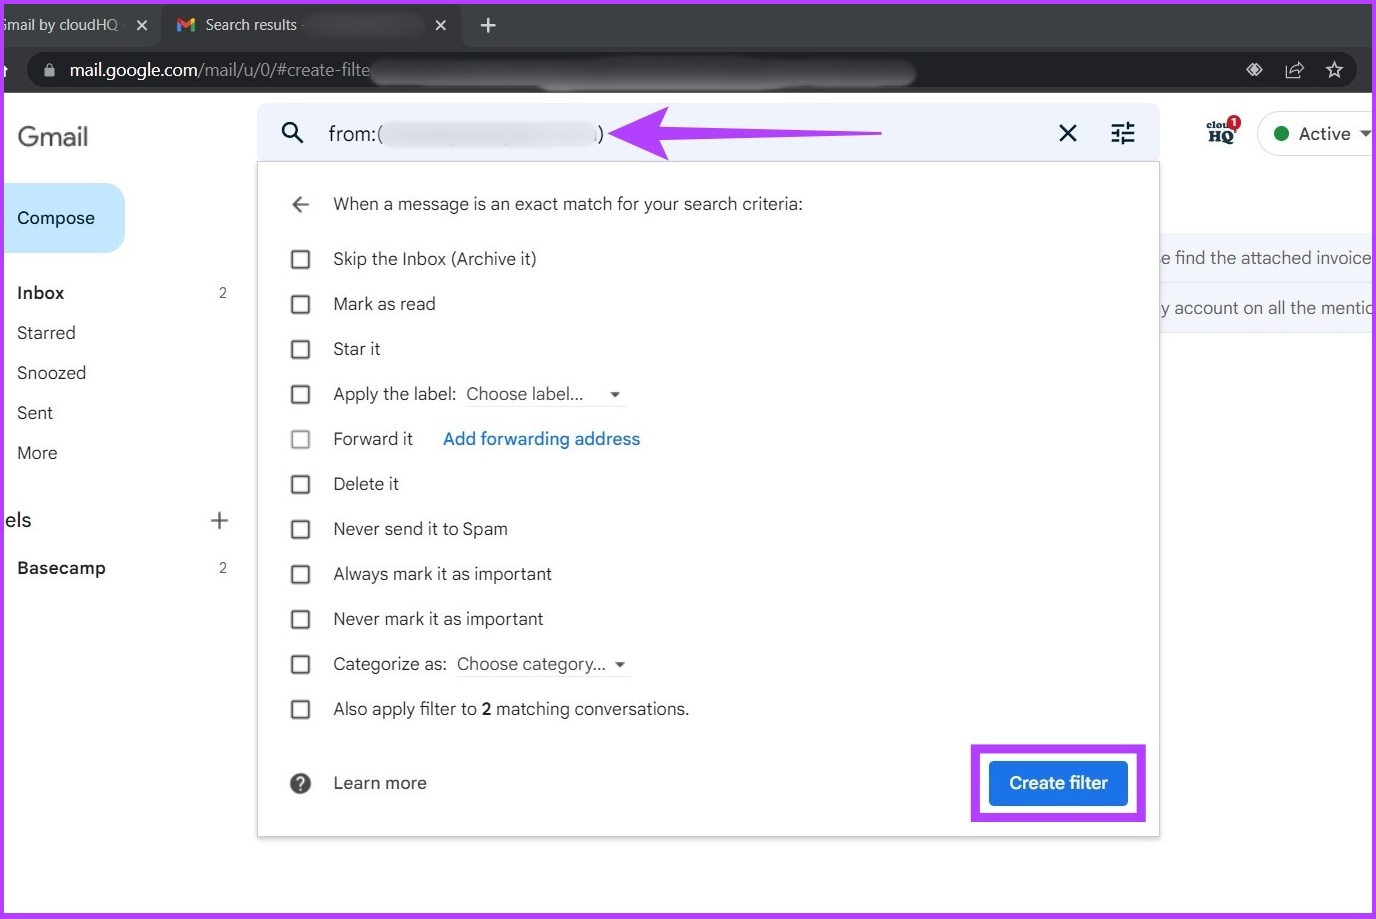
Step 4: Type your address in the from field and click on Create filter.
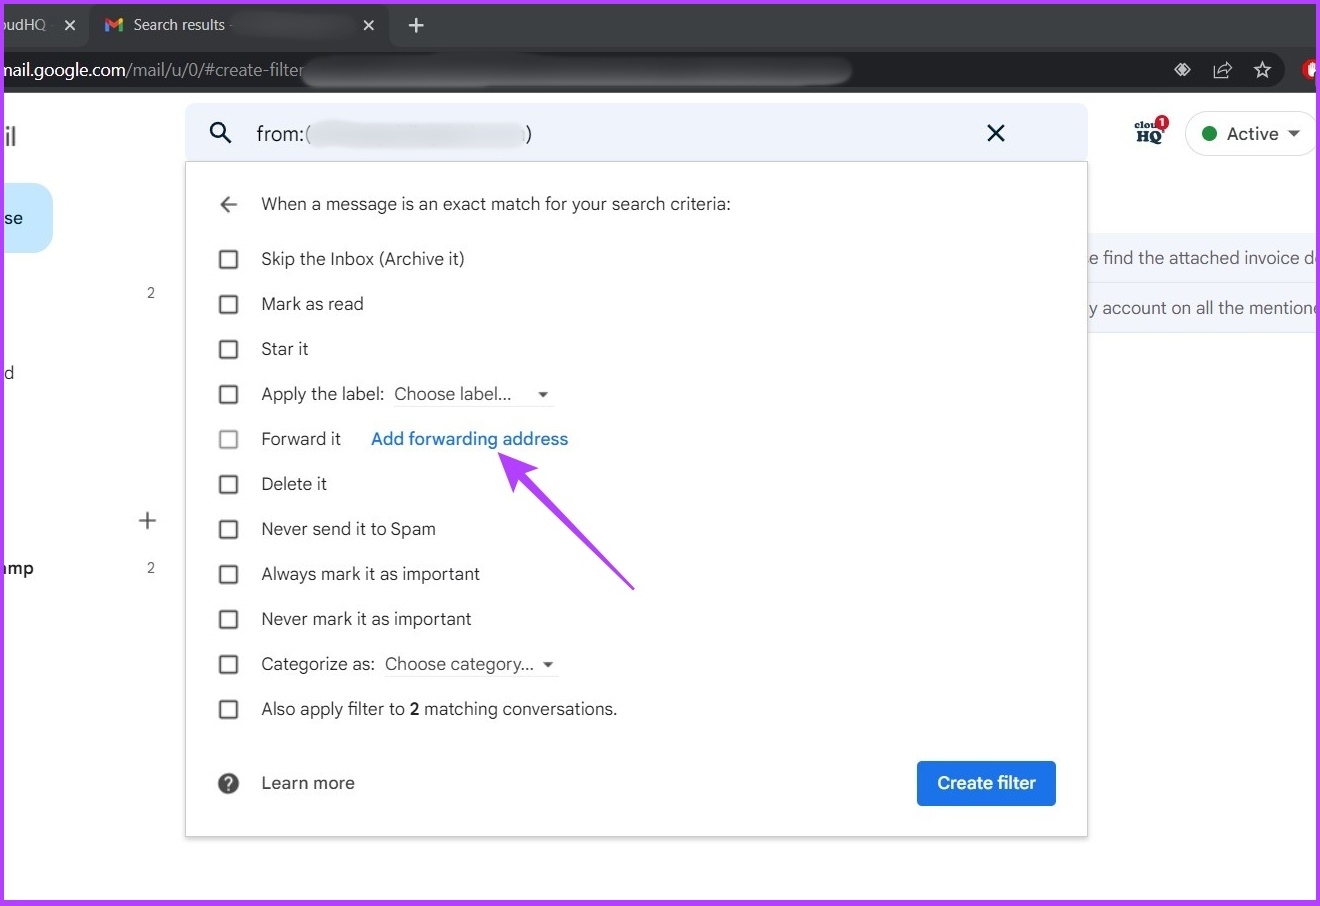
Step 5: Now, select the option Forward it to. If it is blurred, click on ‘Add forwarding address’.
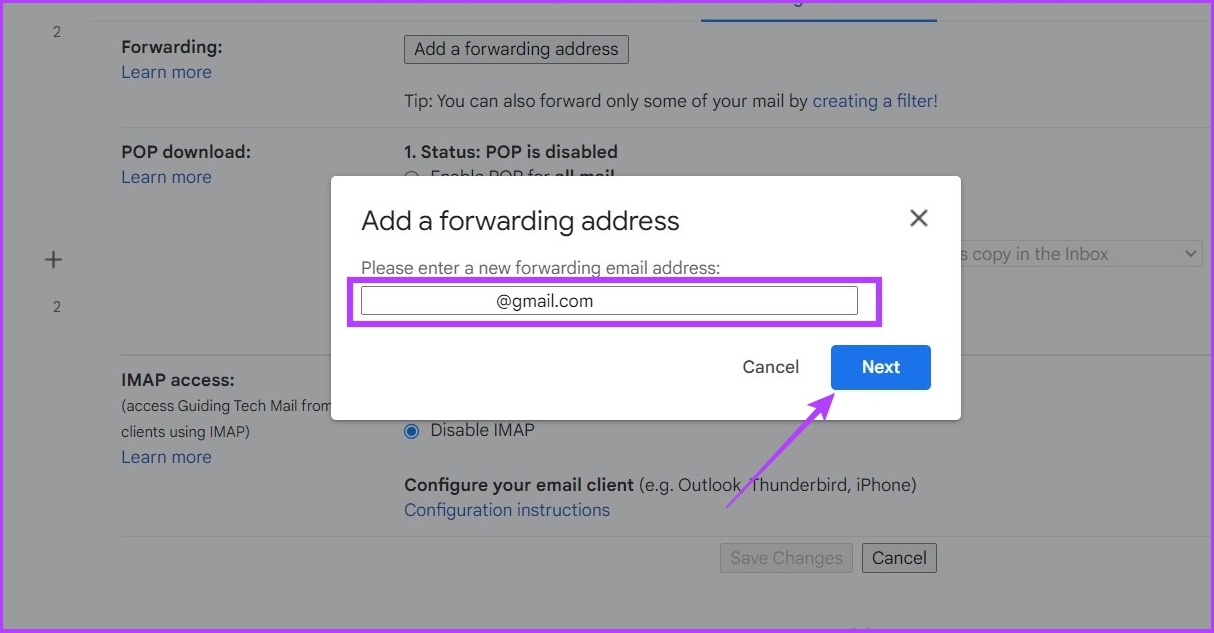
Step 6: Enter your email address and click on Next.
That’s it. You’re good to go with Gmail’s native auto-forward option rather than using a third-party Chrome extension.
Easing the Outlook and Gmail Automations
Automating the CC and BCC process helps save a lot of time and tussle for you to work around. I hope this guide on how to automatically CC or BCC yourself in Outlook and Gmail helped you. Don’t forget to share it with someone who you think will save a lot of time using this quick hack. The above article may contain affiliate links which help support Guiding Tech. However, it does not affect our editorial integrity. The content remains unbiased and authentic.