What if you could open multiple apps by creating additional desktops on your Mac? Spaces is a feature that lets you do just that. In this post, we will show you how to use Spaces on Mac to improve productivity.
What Is Spaces on Mac
Spaces is a virtual desktop feature that arrived with the release of macOS X 10.5 Leopard . It lets you create different desktops on your Mac for opening and working with various apps at the same time. You don’t need to deal with a cluttered desktop with open app windows. Switching between apps for different needs becomes way easier with Spaces. When you work in a Space, only the apps you open in that Space will be visible on the screen.
How to Create a Space on Mac
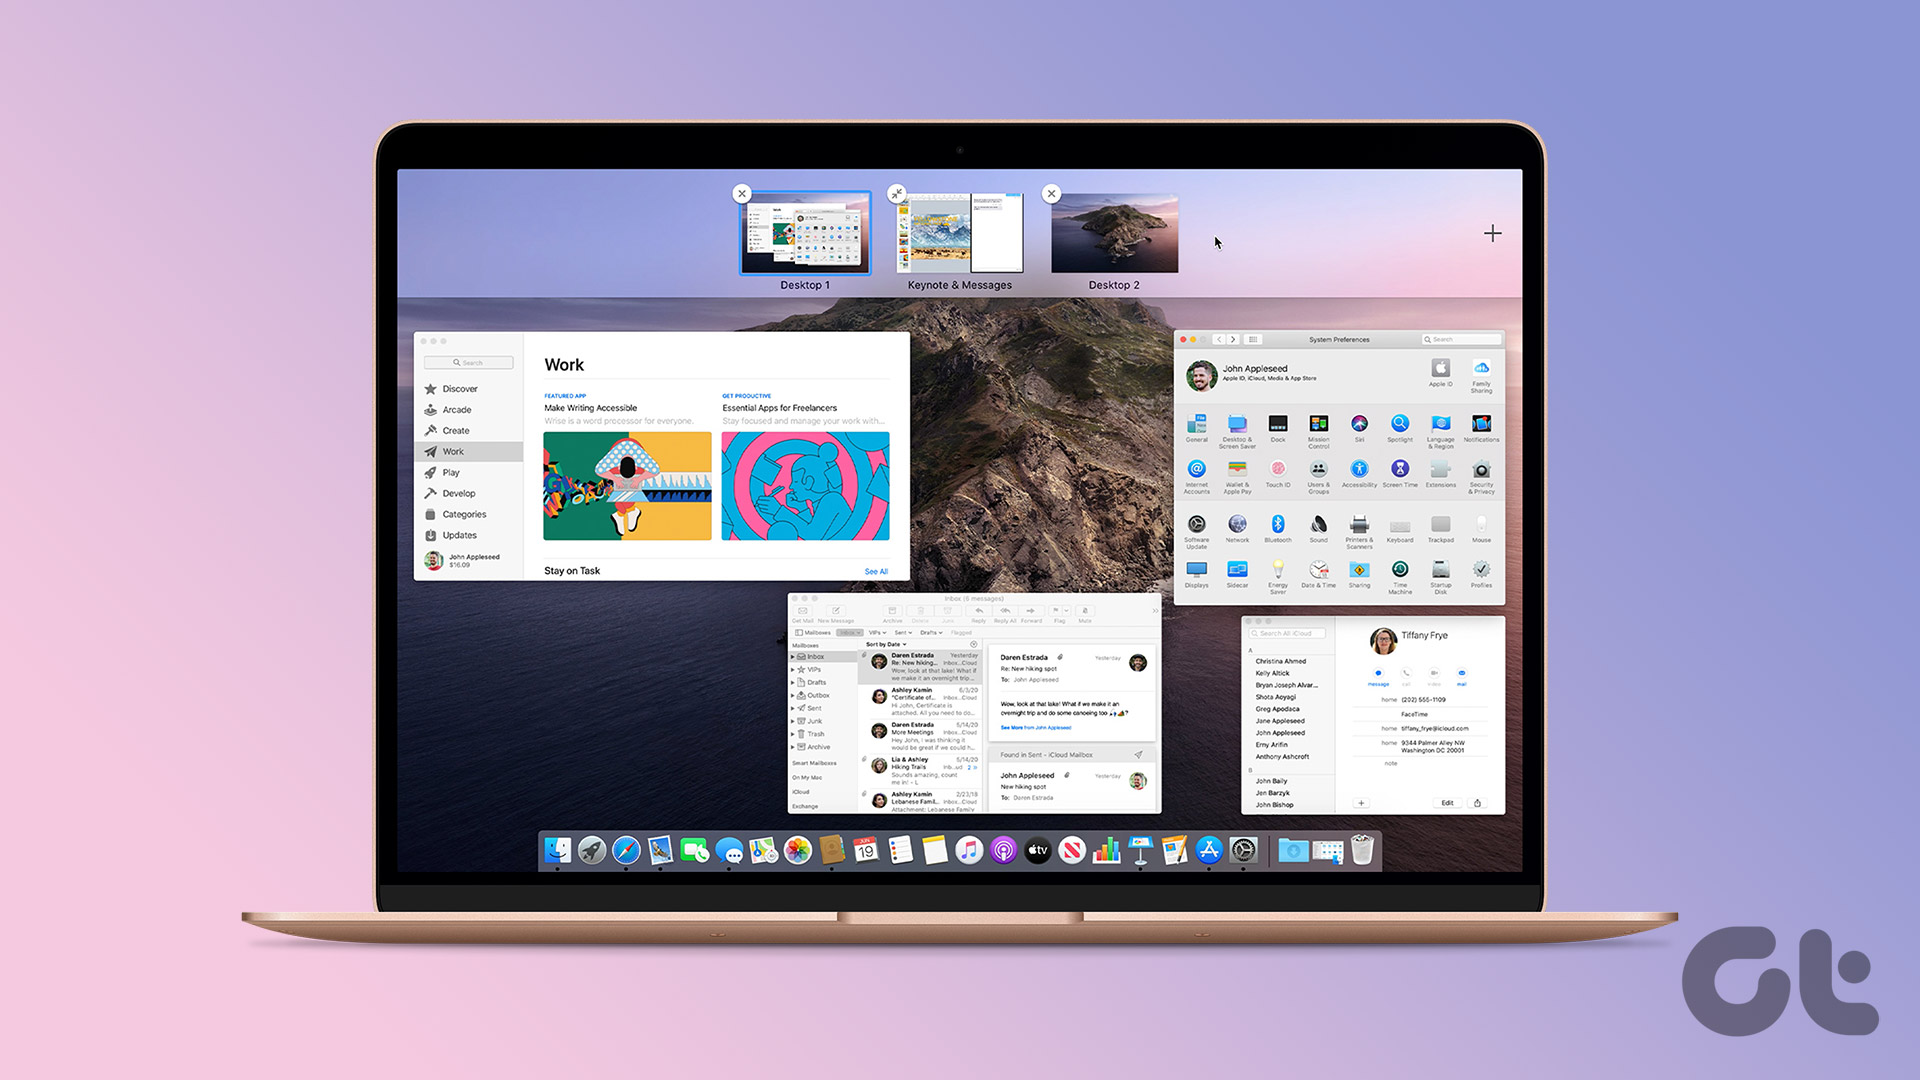
Let us show you how you can create a Space on your Mac. If you plan to use different apps for personal and professional needs, creating separate Spaces on your Mac will help you to manage your workflow better. Step 1: On your Mac, enter Mission Control by swiping upwards on the trackpad with three fingers or pressing the Mission Control key (F3) on your Mac keyboard. Step 2: After all your app open windows are shown on screen, bring your mouse pointer to the top Spaces bar.
Step 3: Click the Plus icon on the top-right corner of your screen.
You will see a new Desktop Space thumbnail created at the top. Step 4: Click the new Desktop thumbnail to enter the new desktop Space on your Mac.
You can create up to 16 Spaces on your Mac using the same steps mentioned above.
How to Switch Between Spaces on Mac
After creating several Spaces on your Mac, you can use different apps and background in each Space. Do note that you cannot change the name of your Spaces. Here’s how you can switch seamlessly between Spaces on your Mac.
For Trackpad
Swipe left or right using three fingers to switch between Spaces.
For Magic Mouse
Switch between Spaces by swiping with two fingers.
For Mac Keyboard
Press Control + Left or Right Arrow keys to move between different Spaces.
How to Move Apps Between Spaces
After creating different Spaces, you can easily move an open app window from one Space to another. Here’s how to do it. Step 1: Open Mission Control by swiping up with three fingers. Step 2: Bring the mouse pointer to the open app window that you wish to move to a new Space. Step 3: Click to drag the open app window to the Desktop Space of your choice.
Alternatively, you can drag the open app window to the edge of your screen, and it will move to the next Space.
How to Assign Apps to Spaces
Instead of dragging and dropping open app windows every time, you can assign particular apps like Notes, Safari, and Calendar to open in a specific Space. This will ensure that those apps will open in your preferred Space only. Here’s how. Step 1: Go to the Desktop Space of your choice. Step 2: Right-click on the app icon you want to assign for that Space.
Step 3: Go to Options.
Step 4: Select This Desktop to assign the app.
How to Delete a Space on Mac
Here’s how you can delete a Space on your Mac if you ever feel like doing so. Your Mac will save all the downloaded files or screenshots taken in that Space. No need to worry about data loss. You can access those files from any Space on your Mac. Step 1: Open Mission Control by pressing the Mission Control Key (F3) on your Mac keyboard. Step 2: Bring your mouse pointer to the thumbnail of your Space that you wish to delete.
Step 3: Click on the X icon at the top-left corner of the Space thumbnail.
You can use the same method to delete other Spaces on your Mac.
Space Out Your Work
Spaces on Mac is a great tool to get your different tasks done most effectively. And since we are talking about productivity, here are some great devices to boost productivity while working from home. The above article may contain affiliate links which help support Guiding Tech. However, it does not affect our editorial integrity. The content remains unbiased and authentic.