There’re a few ways to change the priority level for programs on Windows. In this post, we’ll walk you through all of them. But first, let’s understand when it’s appropriate to change a program’s priority level.
When Should You Change the Priority Level of a Program
By default, Windows 11 assigns different priority levels to each process based on its importance. Ideally, you wouldn’t need to tinker with it. However, if you want to devote more resources to a specific app or program, you can change its priority level. Windows has six priority levels: Realtime, High, Above normal, Normal, Below normal, or Low. It’s worth noting that increasing the process priority level for too many apps and programs can also cause system instability. Hence, only modify process priority for a program when it is necessary.
1. Change Process Priority via Task Manager
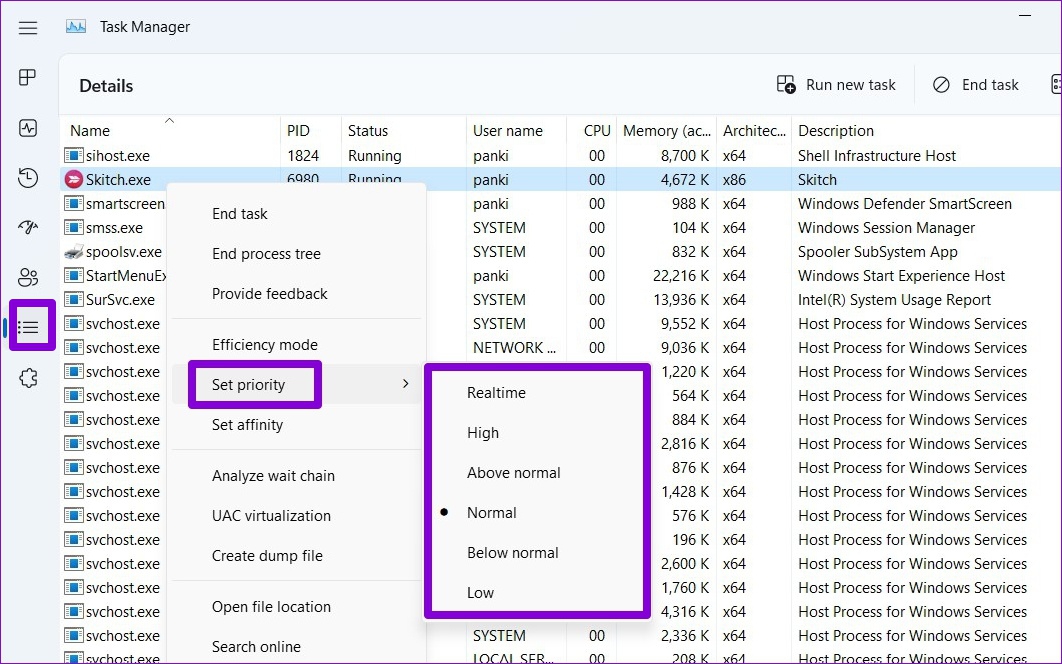
Task Manager is a handy utility that lets you manage various apps, processes, and services on Windows. You can also use it to change the priority levels for apps and programs. Here’s how. Step 1: Press Ctrl + Shift + Esc on the keyboard to launch the Task Manager. Step 2: Head over to the Details tab and locate the .EXE process for your program. Right-click on it, go to Set priority, and select from the available options.
Step 3: Click on Change priority to confirm.
Once you complete the above steps, your program will operate on the specified priority level until you close it.
2. Change Process Priority Using Command Prompt
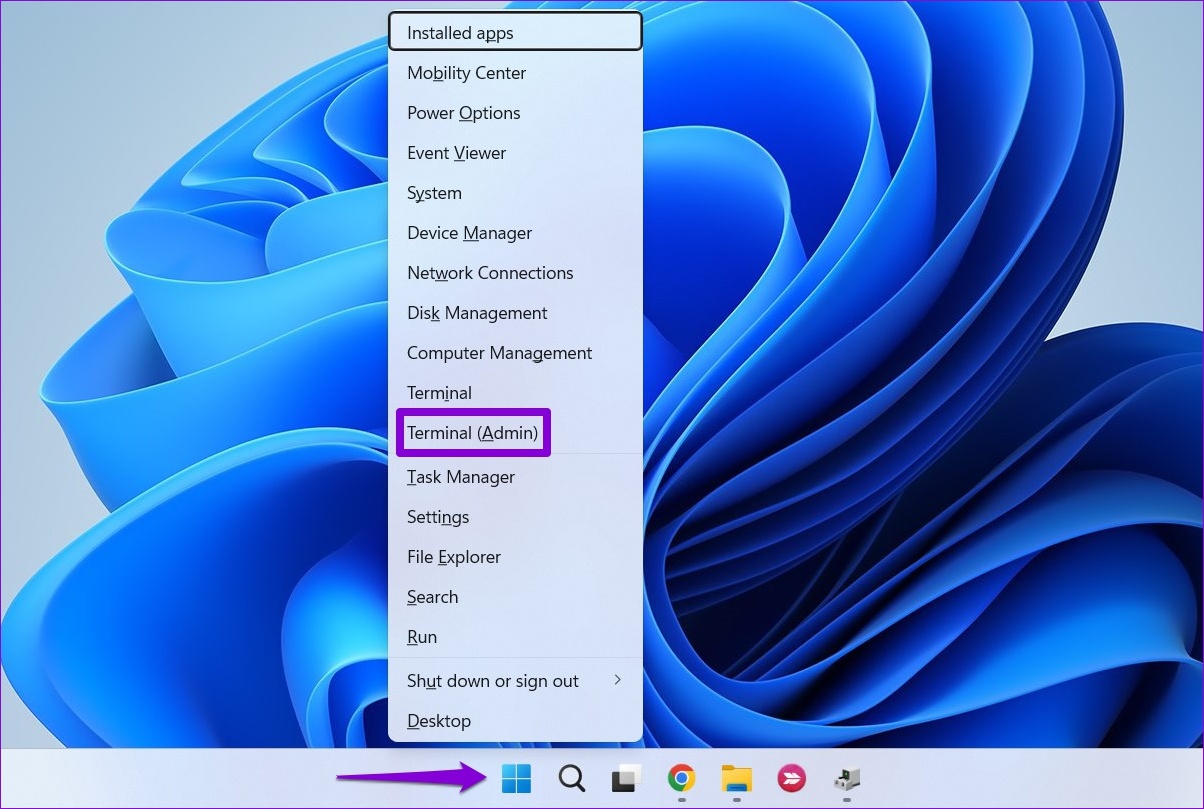
If you’re an avid Windows user who prefers to make changes via the Command Prompt, you can also change the priority level of a program by running a command. Here’s how. Step 1: Right-click on the Start menu and select Terminal (Admin) from the list.
Step 2: In the console, paste the following command and press Enter. Replace ProcessName in the above command with the actual name of the process. Similarly, replace PriorityLevel with the priority level you want to use: Realtime, High, Above normal, Normal, Below normal, or Low.
Once you execute the command, your program will run at a different priority level.
3. Change Process Priority Using PowerShell
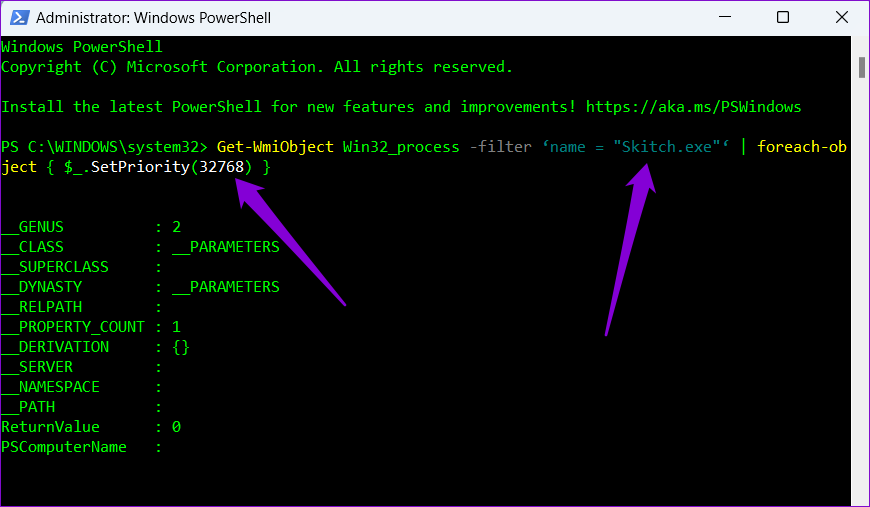
Similar to Command Prompt, you can also execute a command via PowerShell to change the priority level of a program. Here’s what you’ll need to do. Step 1: Click on the search icon on the Taskbar, type Windows PowerShell and click on Run as Administrator.
Step 2: Paste the following command in the PowerShell window and press Enter. Replace ProcessName in the above command with your program’s name. Replace PriorityLevelID with the ID code associated with the priority level. Here are the ID codes for different priority levels:
Realtime: 256 High: 128 Above Normal: 32768 Normal: 32 Below Normal: 16384 Low: 64
So, for example, if you want to set process priority for Skitch to Above normal, you should enter the following command.
4. Change Process Priority by Creating a Shortcut
If you want Windows to always launch a program at a certain priority level, you can also create a custom desktop shortcut for it. This will eliminate the need to change the priority level every time you launch that program. Step 1: Right-click on your program and select Properties.
Step 2: Copy the file path mentioned in the Target field.
Step 3: Next, right-click anywhere on the empty space on the Desktop, go to New, and select Shortcut.
Step 4: In the Shortcut wizard, type the following path in the box. Replace ProgramName in the above command with the actual name of your program and Priority with any priority level: Realtime, High, Above normal, Normal, Below normal, or Low. Also, replace FilePath with the path copied in Step 2.
Step 5: Enter a suitable name for the shortcut and click on Finish.
And you’re good to go. You can use this shortcut to run your program at the specified priority level.
5. Change Process Priority With Registry Editor
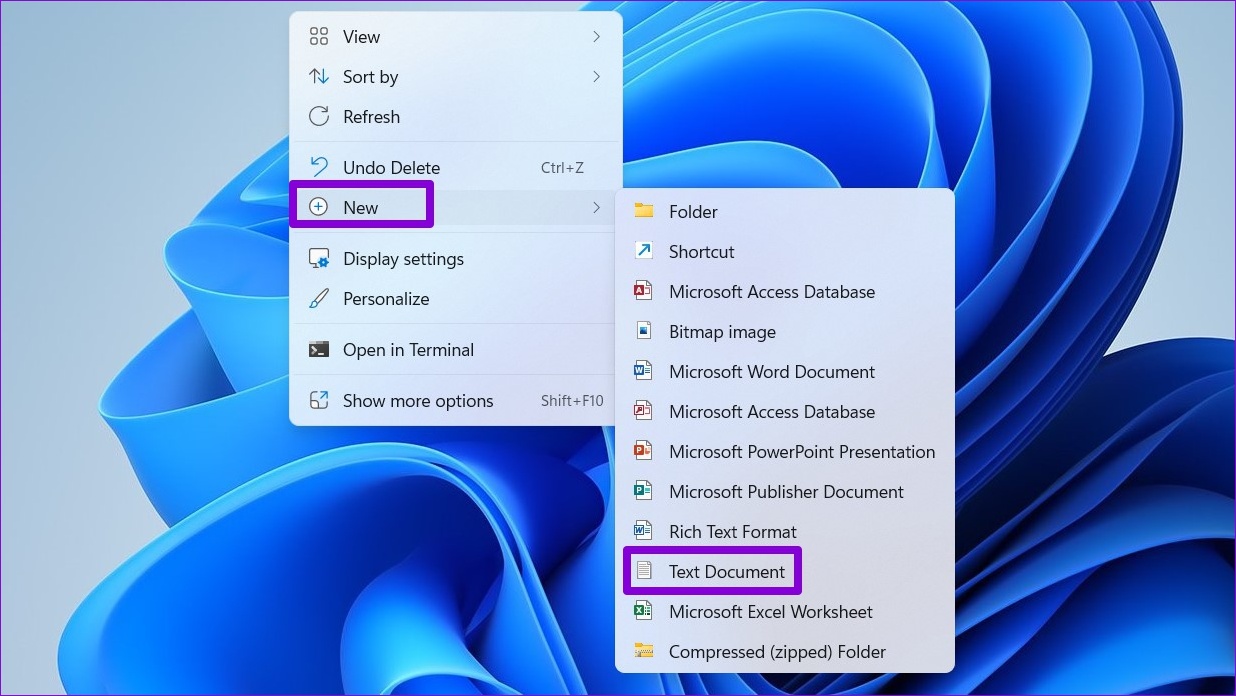
Another way to change the process priority level on Windows is through the Registry Editor. It’s important to note that Registry Editor carries important settings for Windows and its apps. Hence, you should only use this method after backing up the existing registry files. Step 1: Right-click anywhere on the empty space on the Desktop, go to New, and select Text Document.
Step 2: Paste the following command in the notepad window. Replace ProgramName in the above command with the actual name of your program. Replace Priority with the hex value associated with the priority level. Here are the hex values for different priority levels:
High: 00000003 Above Normal: 00000006 Normal: 00000002 Below Normal: 00000005 Low: 00000001
Step 3: Press Ctrl + Shift + S to open Save as dialog and save the file with the ‘.reg’ extension.
Step 4: Double-click on the newly created registry file and click on Yes to proceed.
After that, restart your PC to allow Windows to change your program’s priority level.
Priority Matters
Besides the above methods, there’re plenty of third-party programs that you can use to change priority levels for apps and programs on Windows. However, if you prefer native methods, you can use any of the methods listed above to manage priority levels for programs. The above article may contain affiliate links which help support Guiding Tech. However, it does not affect our editorial integrity. The content remains unbiased and authentic.