You are up for a lot of confusion and mistakes when the notifications sound stops working out of nowhere. You can’t pinpoint the problem to a specific factor. The issue can be due to several reasons. We will start with some basics and move to advanced tricks to fix the problem.
1. Unmute Your Windows PC
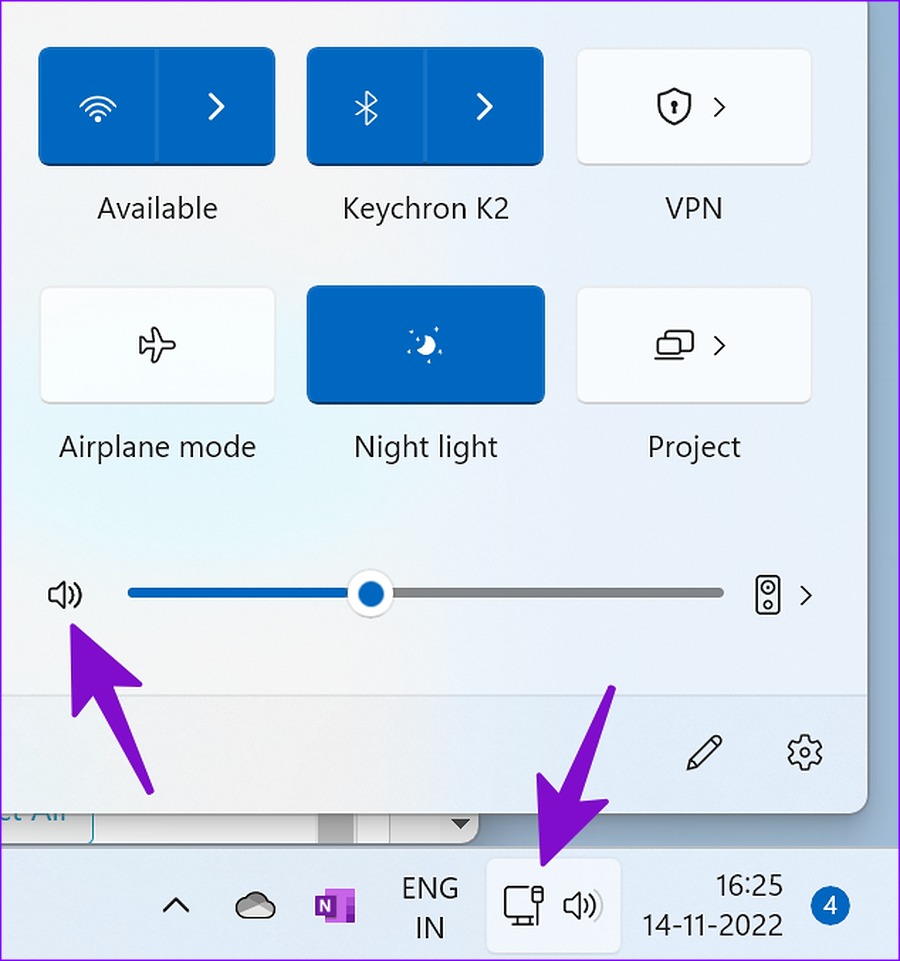
You might have muted your Windows PC and forgotten to unmute it after an important meeting or work hours. If your PC is on mute, change the sound profile to normal and start getting notification alerts without any problem. You’ll need to look for the mute button on your keyboard and unmute the laptop. You can do the same from your Windows taskbar too. Step 1: Select the sound icon in the bottom-right corner of the taskbar. Step 2: Click the speaker icon to unmute your PC and use the slider to increase volume.
2. Check the Sound Output
If you have incorrect sound output settings on Windows 11, the PC won’t use the default speakers for notification sound. Here’s how you can check sound output on your Windows 11 PC. Step 1: Click the sound icon on Windows 11 taskbar. Step 2: Expand the speakers’ menu.
Step 3: Select the relevant sound output device from the menu.
3. Troubleshoot Sound Output Devices
Windows 11 has a handy troubleshooting tool to fix issues with sound output devices. If the connected speaker faces issues, run the troubleshooter to fix the problem. Step 1: Open Windows 11 Settings menu (use Windows + I keys). Step 2: Select ‘System’ from the left sidebar. Step 3: Click Sound.
Step 4: Find ‘Troubleshoot common sound problems’ under the ‘Advanced’ menu. Step 5: Select ‘Output devices’ and run the troubleshooter.
Step 6: Select your output device from the following menu and hit Next.
4. Disable Do Not Disturb
When you enable DND (Do Not Disturb) on Windows 11, the system sends notifications directly to the notification center without disturbing you with a banner or sound. Here’s how you can disable DND on your PC. Step 1: Select the Clock and date menu in the top right corner of the Windows taskbar. Step 2: Click the DND icon beside ‘Notifications’ to disable it.
Windows 11 automatically enables DND when you play a game, duplicate your display, use an app in full-screen mode, and for the first hour after a Windows feature update. Follow the steps below to disable such behavior. Step 1: Open the System menu in Windows 11 Settings (refer to the steps above). Step 2: Select Notifications and expand ‘Turn on do not disturb automatically.’
Step 3: Disable the checkmark besides relevant scenarios and start getting notifications banners and sound.
5. Check Notification Sound Settings for a Specific App
Do you face notification sound issues in a specific app only? You should check notification settings for affected apps from the Settings menu. Step 1: Open the Settings app and go to the Notifications section (check the steps above). Step 2: Scroll down to installed apps.
Step 3: Open an app and enable the ‘Play a sound when a notification arrives’ toggle.
Repeat the same for all affected apps, and you should start getting a notification sound on your PC.
6. Unmute Conversation and Channels
Did you mute a Slack channel or WhatsApp conversation on Windows 11? You will continue to get new messages without any interruptions. Here’s how you can unmute such conversations.
Slack
Step 1: Launch Slack on your PC and select a channel. Step 2: Right-click on it and select Unmute channel from the context menu.
Step 1: Open WhatsApp on your Windows PC. Step 2: You shall notice the mute icon beside personal chat and groups. Step 3: Right-click on such chat threads, expand Muted, and select Unmute.
7. Disable Bluetooth
When your Windows laptop accidentally connects to your Bluetooth headphones or TWS (True Wireless Stereo), you start getting notification sound on the connected device and not on your laptop. You can either disable Bluetooth or remove unnecessary Bluetooth devices from your Windows machine. Step 1: Open the Windows connectivity menu from the taskbar. Step 2: Disable Bluetooth.
8. Restart Windows Audio
You can restart Windows audio services to fix the notification sound not working problem. Step 1: Press the Windows key and search for Services. Hit Enter.
Step 2: Scroll to ‘Windows Audio.’
Step 3: Right-click on it and select ‘Restart’ from the context menu.
Stay Alert on Your Work Machine
You can also head to individual app settings and change the notification sound to a custom tone. Which trick worked for you to resolve the notification sound not working issue? Share your findings in the comments section below. The above article may contain affiliate links which help support Guiding Tech. However, it does not affect our editorial integrity. The content remains unbiased and authentic.


